Happy is the Pioneer


Page 2
INTRODUCTION
You might think that it is strange to have a beaver wearing a tin hat on the cover of a book about pioneers. But Olaf the old Norwegian tree feller of the Ruakituri Valley had a lot in common with beavers.
He had a tremendous love for the trees, and like the beaver, he would only chop down a tree when he really needed its timber. The beaver had much the same frame of mind as old Olaf, because he too, only fell the trees that he needed. The beaver was once despised because of the mess that he made with his tree felling and his dam building . . . Today things are changing, and the beaver is earning himself quite a reputation as a water conservationist!
But the beaver hasn’t changed, he’s still doing it the same way as he always did it. Old Olaf was a man of the axe, and the axe hasn’t changed either. It is the same today as it has always been. And the only thing that could make it chop down a tree was the hand of the human.
There is a remote, but interesting connection between old Olaf and the beaver, and that is the reason why we have selected the beaver to hand on a few tips from the old master of the axe.
And with the resurgence of interest in the pas we thought that this little booklet could possibly be of some use to someone. But even if it doesn’t teach anyone anything it will have at least tried to preserve the tremendous importance of the simple things that brought us out from the darkness of the caves into the light of day . . .
Page 3
PART 1
PIONEER LIFE IN THE VALLEY
Old Olaf was a pioneer timber splitter in the Ruakituri Valley. He, like thousands of others had sailed away from his native heath to seek happiness and wealth in a new land . . . Some of them did manage to find happiness, others managed to find money but few ever found both. Olaf was different, he certainly didn’t find much money, but he never looked very happy either!
He rarely smiled, and he never ever swore. If there had ever been certificates and degrees awarded to timber splitters old Olaf would have been able to have lined his shack with them. But he could never have written a book because he could neither read nor write. Yet he was a walking educational faculty on the why’s and the wherefores of the tree world and axe.
Old Olaf came into the Ruakituri Valley long before I was born, and he was an old man by the time I was big enough to work along side of him. His knowledge of trees and the axe was nothing short of colossal, and he did his best to pass it on to me.

Page 4
Luckily for me I was a fairly good listener in those days, and I learned a lot from him. And although the axe brought me neither fortune nor fame it has taken me more than half way around the world, and has helped me to meet some mighty people in all walks of life.
I was born and bred in the Ruakituri Valley almost seventy five years ago. But the Valley was so far behind the rest of New Zealand that it could well have been several hundred years ago. The reason why the Valley was so far behind was probably because of its sheer isolation. It was cut off on one end by the mighty Te Reinga falls, and the other end was blocked by the great Urewera forest, an area of several million acres of solid bush.
To the early pioneers who went in there it was a haven of happiness because it was completely sealed off from the troubles of the outside world. But there were none of the things that the other places had . . . there was no road, no bridges, no school, no church, no pub.
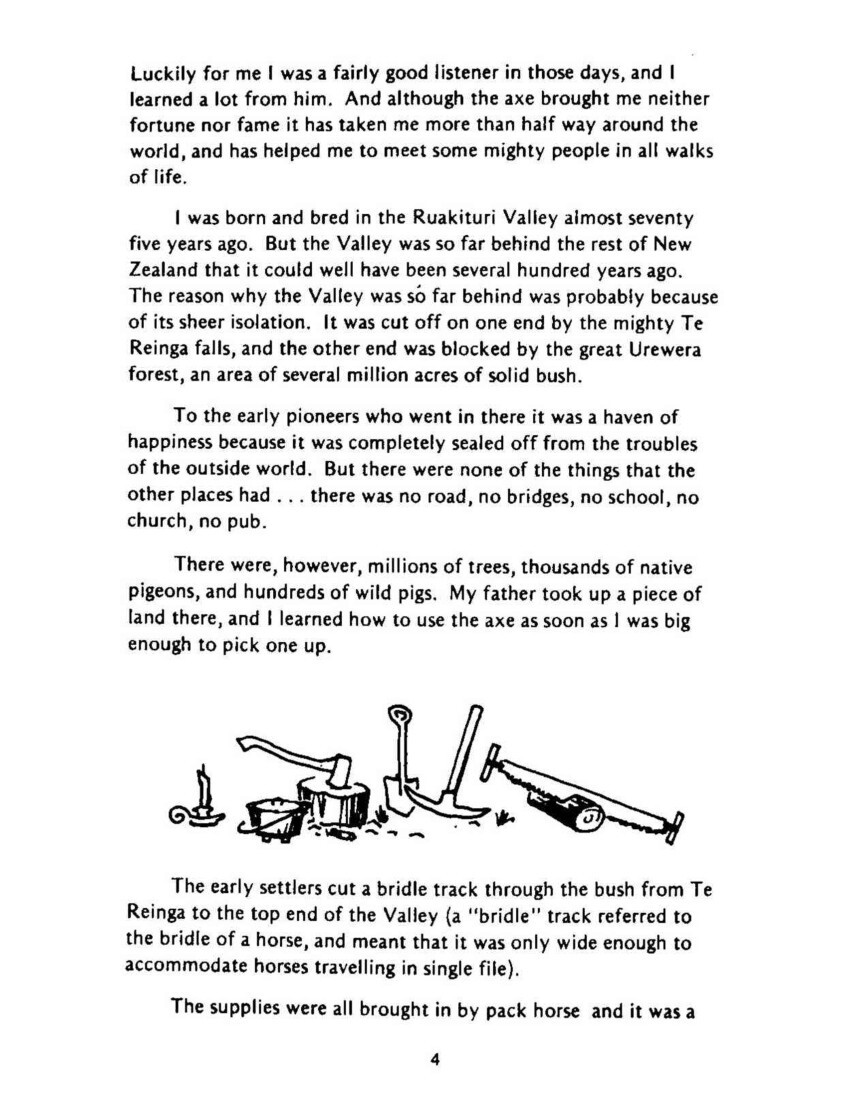
There were, however, millions of trees, thousands of native pigeons, and hundreds of wild pigs. My father took up a piece of land there, and I learned how to use the axe as soon as I was big enough to pick one up.
The early settlers cut a bridle track through the bush from Te Reinga to the top end of the Valley (a “bridle” track referred to the bridle of a horse, and meant that it was only wide enough to accommodate horses travelling in a single file).
The supplies were all brought in by pack horse and it was a

Page 5
never to be forgotten experience to witness fifty, or perhaps even a hundred pack horses, all travelling in single file, and all with little bells on their necks that tinkled at every step. If a horse wandered off into the bush and became lost the sound of the bell would lead the searcher to it.
The pack horse brought in things such as; flour, sugar, oatmeal, tea, raisins, golden syrup, treacle, salt, campovens, billies, tin plates, enamel mugs, axes, saws, spades, shovels, grass seed, candles, matches, tents, blankets, and when people began to prosper a little the pack horses carried gramophones, pianos and iron bedsteads.
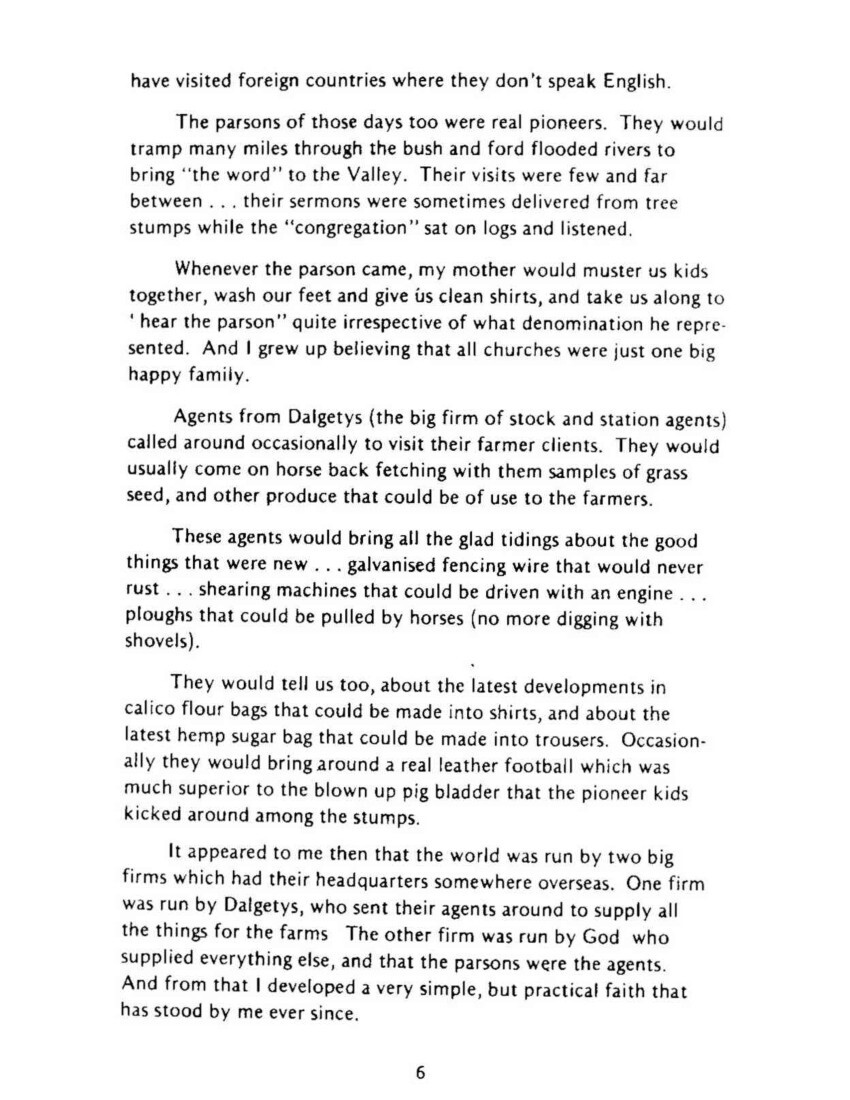
Sheep shearing was done by hand with shears that worked something like scissors. At the end of the day the shearer would be as black as the ace of spades because the sheep were covered with charcoal from the bush burns.
The wool was packed in big jute bags called pockets (they held about one hundred pounds of wool). The pack teams were loaded with two pockets per horse, and the wool was set off on the first leg of its long journey to London (on one occasion our wool brought only three pence per pound when it got there).
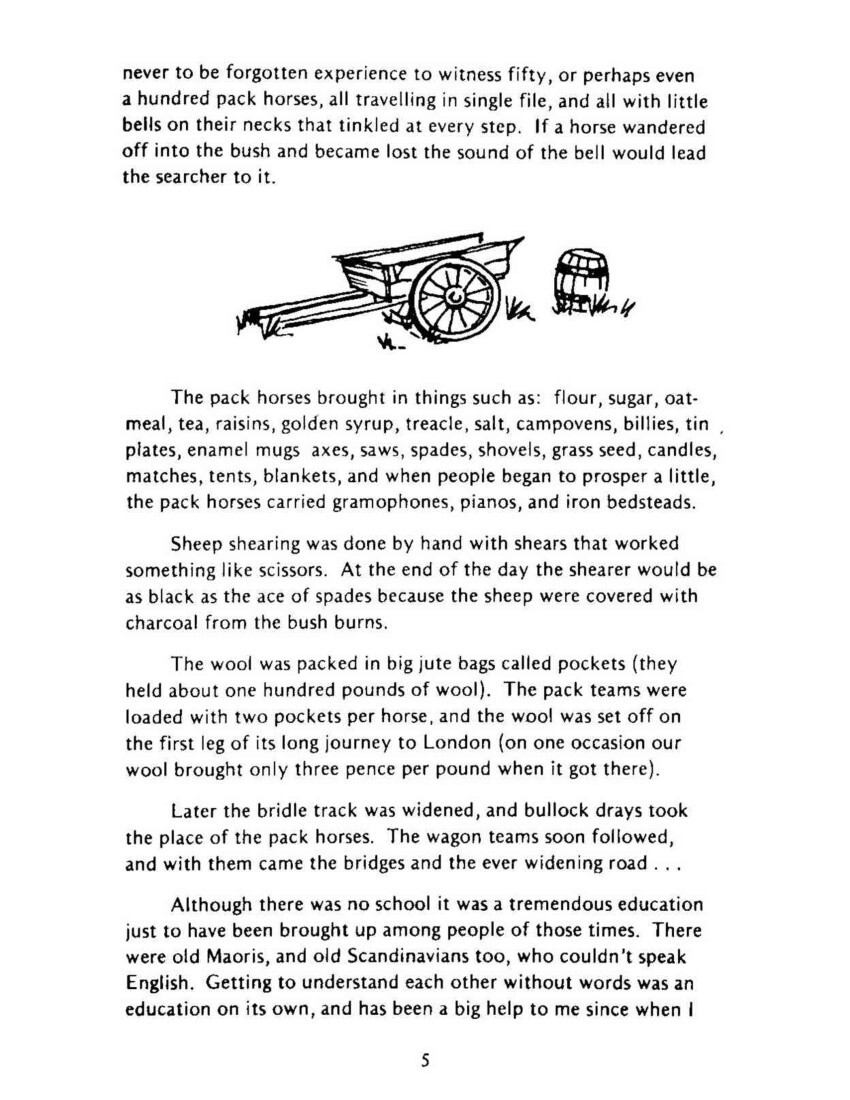
Later the bridle track was widened, and bullock drays took the place of the pack horses. The wagon teams soon followed, and with them came the bridges and the ever widening road . . .
Although there was no school it was a tremendous education just to have been brought up among people of those times. There were old Maoris, and old Scandinavians too, who couldn’t speak English. Getting to understand each other without words was an education on its own, and has been a big help to me since when I

Page 6
have visited foreign countries where they don’t speak English.
The parsons of those days too were real pioneers. They would tramp many miles through the bush and ford flooded rivers to bring “the Word” to the valley. Their visits were few and far between . . . their sermons were sometimes delivered from tree stumps while the “congregation” sat on logs and listened.
Whenever the parson came, my mother would muster us kids together, wash our feet and give us clean shirts, and take us along to “hear the parson” quite irrespective of what denomination he represented. And I grew up believing that all churches were just one big happy family.
Agents from Dalgetys (the big firm of stock and station agents) called around occasionally to visit their farmer clients. They would usually come on horse back fetching with them samples of grass seed, and other produce that could be of use to the farmers.
These agents would bring all the glad tidings about the good things that were new . . . galvanised fencing wire that would never rust… shearing machines that could be driven with an engine . . . ploughs that could be pulled by horses (no more digging with shovels).
They would tell us too, about the latest developments in calico flour bags that could be made into shirts, and about the latest hemp sugar bags that could be made into trousers. Occasionally they would bring around a real leather football which was much superior to the blown up pig bladder that the pioneer kids kicked around among the stumps.
It appeared to me then that the world was run by two big firms which had their headquarters somewhere overseas. One firm was run by Dalgetys, who sent their agents around to supply all the things for the farms. The other firm was run by God who supplied everything else, and that the parsons were the agents.
And from that I developed a very simple, but practical faith that has stood by me ever since.

Page 7
The pioneers lived by their faith and their axes. These two things have never changed, and the tongue has never been able to make either of them work.
To the pioneers the axe, the saw, and the tree were the source of all things. With them they built their homes, their fires, their bridges, and their wooden boats. Their fires not only kept them warm and cooked their food it also smelted their first metal.
With the axe they felled the trees to make their wooden boats . . . and when they sailed away to find new lands they always took their axes with them so they could fall a tree to make a home in the new land . . .
My grandfather sailed his own wooden ship . . . the Francis . . . from Denmark to New Zealand in the mid-eighteen hundreds. But he didn’t settle in the Ruakituri Valley. He stayed on in Auckland, where he raised his family. He gave them the best education that was possible in those days including a thorough grasp of the Maori language. This proved to be a tremendous asset among the Maoris in the pioneering days of the Ruakituri Valley. My father raised his family there, and in those days there was no telephone, and it was two days walk to the nearest doctor. But the old, white haired Maoris, who couldn’t talk English, were fountains of knowledge and wisdom when it came to setting broken bones, and making herbal medicine from the plants and trees that grew in the Valley.

Page 8
Round about 1930 (by that time there was a road up the Valley) a bushman by the name of Ned Costello had the misfortune to fall on his axe which inflicted a huge gash in the back of his neck. Luckily for old Ned he was working along side of my brother Jack, who was as strong as a horse, and Jimmy Ranapia a pioneer Maori who understood old medicines.
Old Ned was losing a lot of blood, but Jimmy wasted no time. He showed Jack how to stop the bleeding by squeezing the wound together while he (Jimmy) lit a fire. Then he cut a piece of Rata vine (Rata is a vine that eventually becomes a tree) about fifteen inches long, and put one end of the vine into the fire, and while the vine was heating Jimmy gathered some cobwebs (there are literally millions of them in virgin bush). He covered the wound with the cobwebs. By that time the fire had heated the vine, and juice was bubbling out of the unburnt end. Jimmy then smeared the bubbling fluid over the cobweb, and this completely sealed the wound.
Jack and Jimmy carried old Ned several miles through the bush to the road. Here they loaded them into the old three seater Model “A” Ford, and drove fifty miles over rough bumpy roads to the hospital at Wairoa. And the Maori surgery of Jimmy Ranapia worked so well that old Ned lost no blood at all on that long and hectic trip.
Jimmy was one of the nicest blokes you would ever meet . . . he was always as cheerful as a cricket, and in all the years that I knew him I never ever heard him use a swear word. And whenever he was having a real good time, or feeling very pleased with himself he would say “I have put on my very big happy today” as though it was something extra that he was wearing.
Jimmy has long since crossed the Great River of no return but in my memory his “happy” lives on.
It was the urge to be happy that drove pioneers like Alexander Mills, the cheerful Scot, and Old Olaf, the stern but kindly

Page 9
Norwegian, and a whole host of others, into the wilds of the Ruakituri Valley.
I particularly mention Alex Mills and old Olaf because they were the ones that I knew best, but they were both fairly old men when I was born. Mr and Mrs Mills had no family of their own, but their big slab shack was “home” to us all. Alex Mills was a very helpful man, but he was no bushman . . . I don’t think he ever chopped a tree down, but that didn’t help the trees much because he always paid someone else to do the job for him!
But old Olaf was different, he had no wife, and he owned no land. And like all his ancestors before him Olaf understood trees and how best to split them into timber.
Most of the pioneers were deeply religious people, and Olaf was no exception. He seemed to see a definite connection between God, the trees and the people.
It was his firm belief that the trees were a gift from God, and that there was a “right way” and a “wrong way” to split them. And that if we split them the right way we would be rewarded by the quality of the timber that we produced from them.
Felling trees, and splitting them into timber was a kind of a sacred ritual to Olaf. After selecting the tree most suited to his needs Olaf would take meticulous care in checking that everything was in order. He would check for the lean of the tree, its height and for any loose branches that might fall on him when the tree started to “go” (Figs. 4,5,7). He would also make sure that the falling tree would not damage other trees in its final plunge to earth. And before putting his axe to it he would stand in silence . . .

Page 10
I used to wonder what he was thinking about, but now I think I know. He would again stand in silence when the tree fell.
Then he would take his cross-cut saw and cut the tree into whatever lengths he needed. Shingle lengths were about sixteen inches long, palings were about three feet long, slabs and fencing posts were both about six feet long. Rails for fences or for frames of shacks were about eight feet. But before he started splitting he would always carefully mark the top end of each log (Fig. 3) (the top end was the end nearest the top of the tree).
Olaf always split the logs in the opposite direction to which the tree grew . . . from top to bottom. The split ran truer that way and according to Olaf that was the right way to do it. He always put the roof shingles on bottom end to the top (Fig. 13). He did this because when the water (rain) fell on the roof it ran off again in the same direction as it ran up the tree to feed it during all the years in the life of the tree.
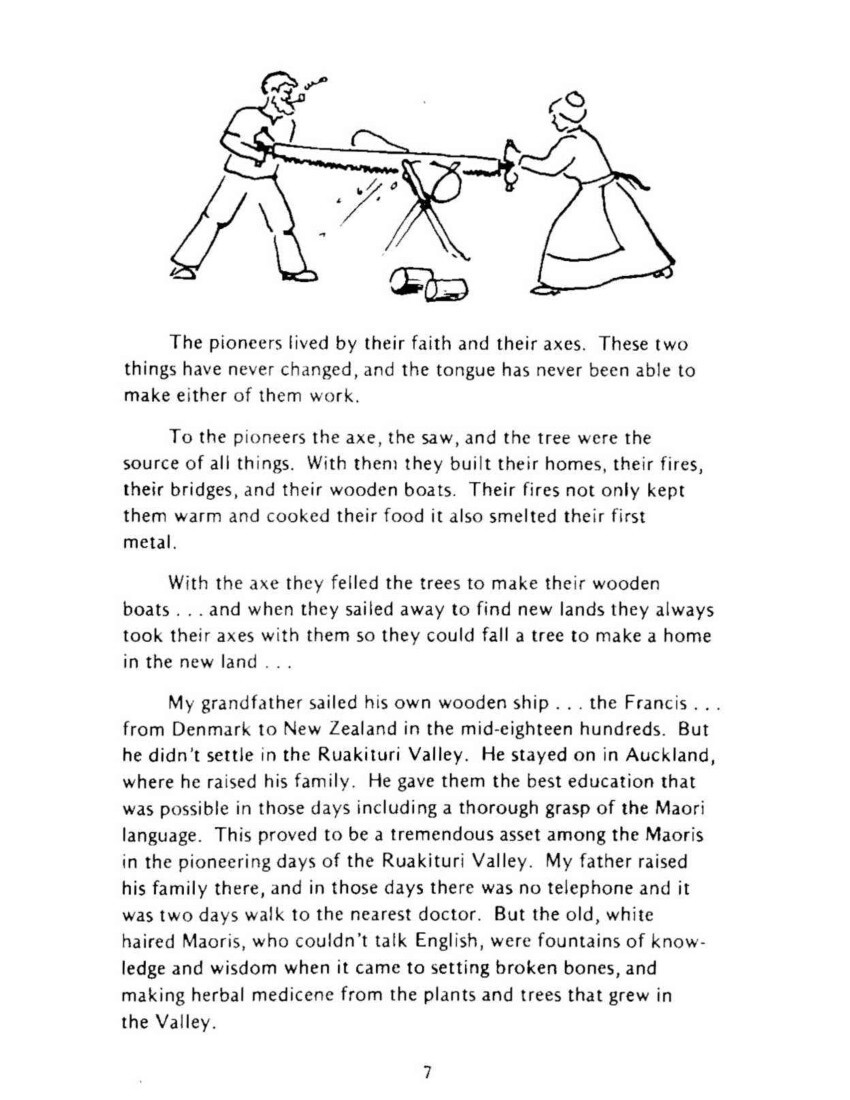
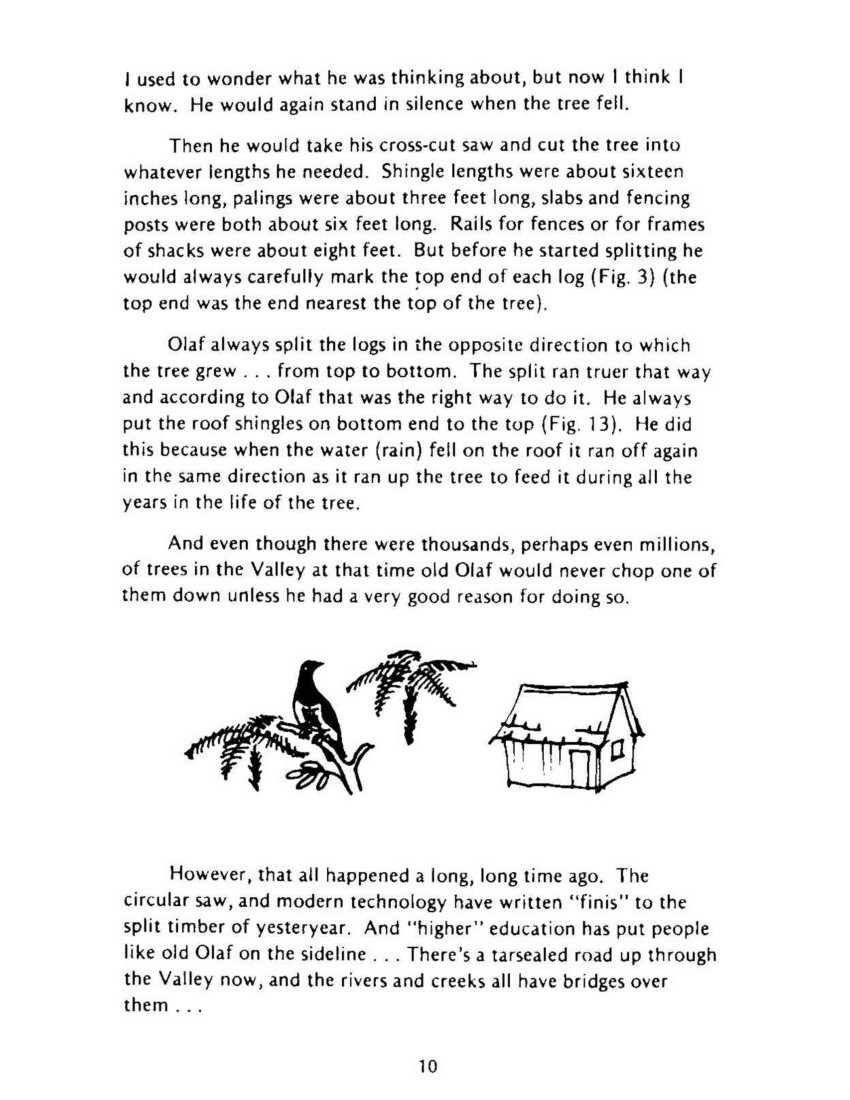
And even though there were thousands, perhaps even millions, of trees in the Valley at that time old Olaf would never chop one of them down unless he had a very good reason for doing so.
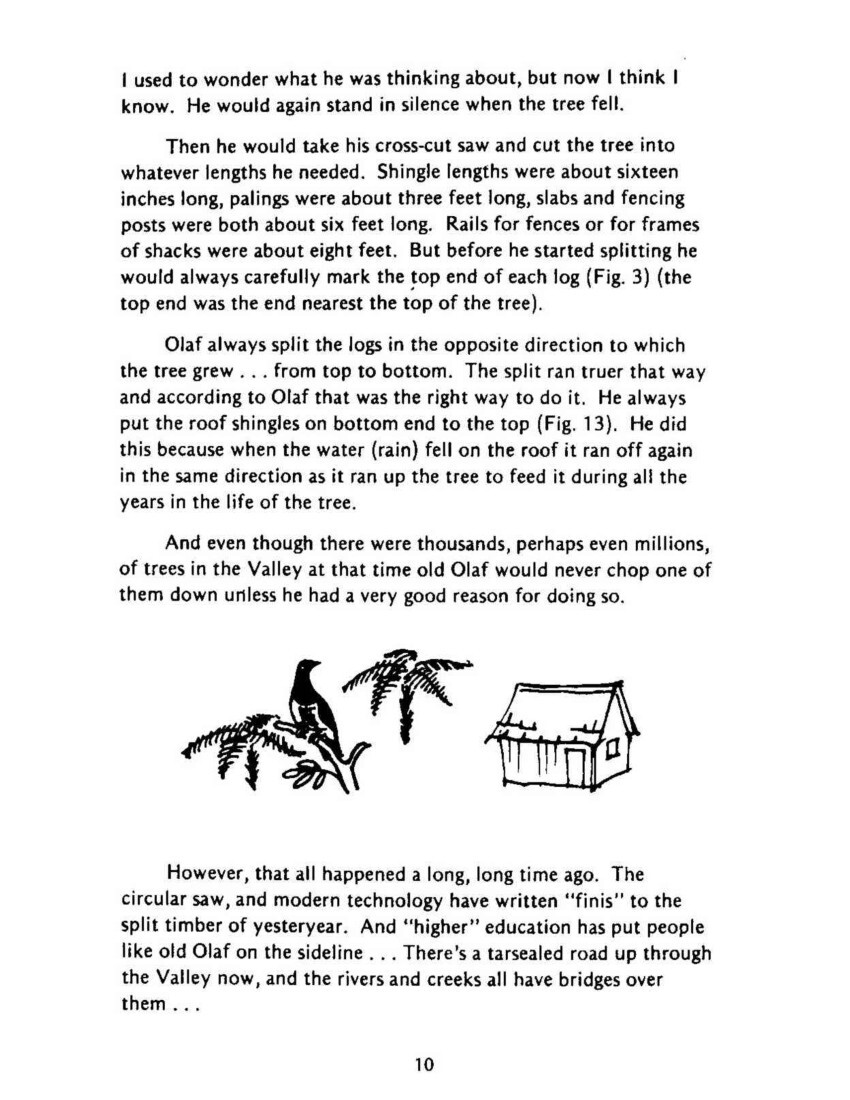
However, that all happened a long, long time ago. The circular saw, and modern technology have written “finis” to the split timber of yesteryear. And “higher” education has put people like old Olaf on the sideline . . . There’s a tar sealed road up through the Valley now, and the rivers and creeks all have bridges over them . . .

Page 11
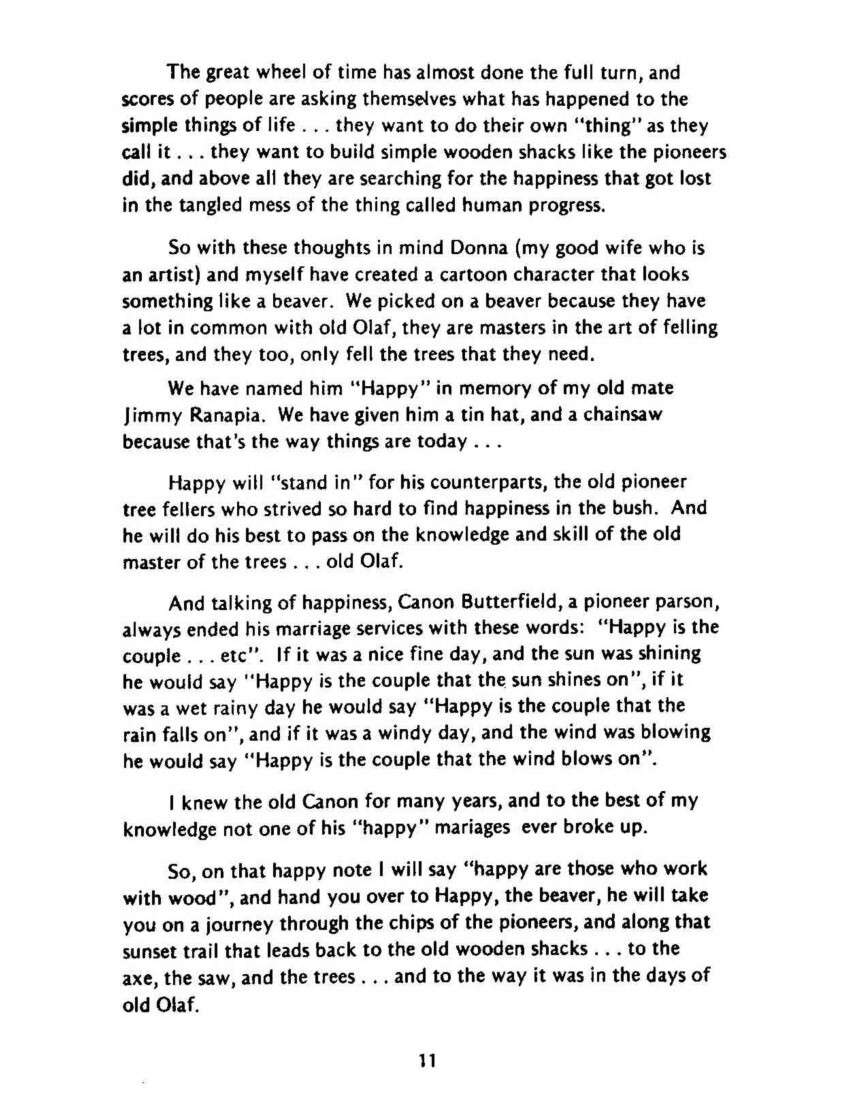
The great wheel of time has almost done the full turn, and scores of people are asking themselves what has happened to the simple things of life . . . they want to do their own “thing” as they call it . . . they want to build simple wooden shacks like the pioneers did, and above all they are searching for the happiness that got lost in the tangled mess of the thing called human progress.
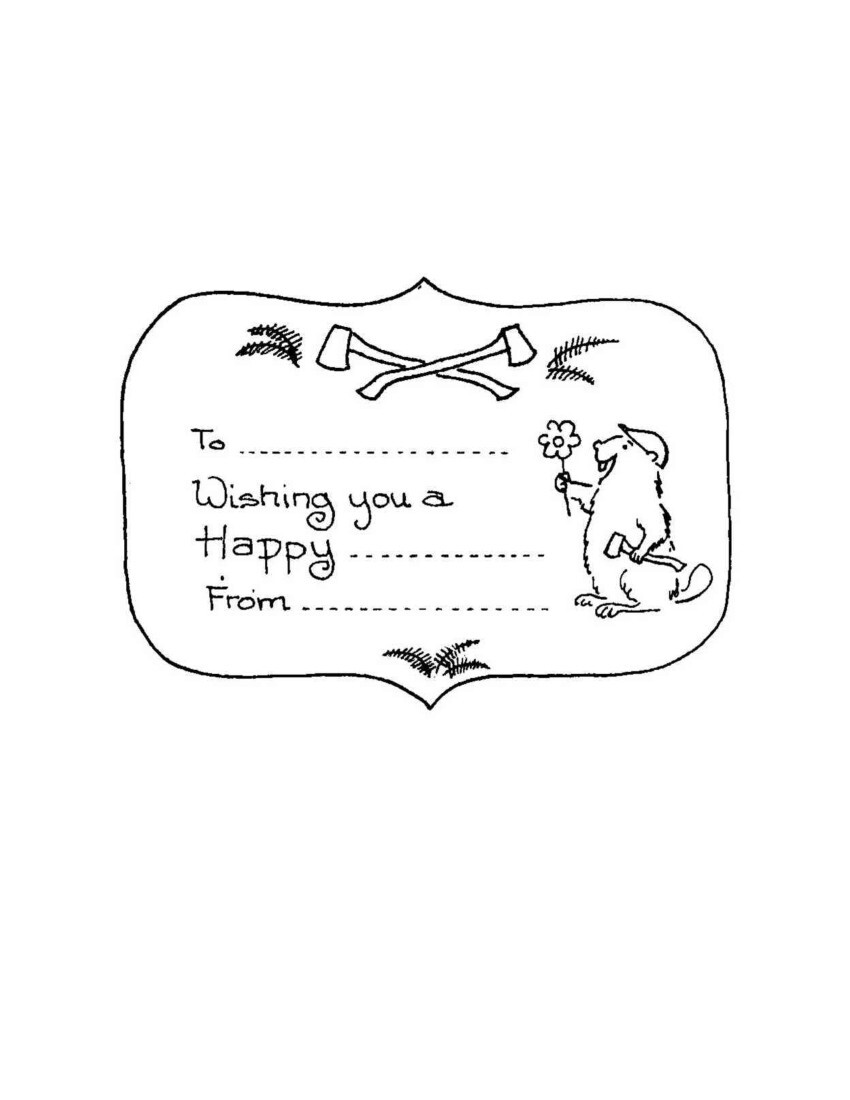
So with these thoughts in mind Donna (my good wife who is an artist) and myself have created a cartoon character that looks something like a beaver. We picked on a beaver because they have a lot in common with old Olaf, they are masters in the art of felling trees, and they too, only fell the trees that they need.
We have named him “Happy” in memory of my old mate Jimmy Ranapia. We have given him a tin hat, and a chainsaw because that’s the way things are today . . .
Happy will “stand in” for his counterparts, the old pioneer tree fellers who strived so hard to find happiness in the bush. And he will do his best to pass on the knowledge and skill of the old master of the trees . . . old Olaf.
And talking of happiness, Canon Butterfield, a pioneer parson always ended his marriage services with these words: “Happy is the couple . . . etc” If it was a nice fine day, and the sun was shining he would say “happy is the couple that the sun shines on”, if it was a wet rainy day he would say “Happy is the couple that the rain falls on”, and if it was a windy day, and the wind was blowing he would say “Happy is the couple that the wind blows on”.
I knew the old Canon for many years, and to the best of my knowledge not one of his “happy” marriages ever broke up.
So, on that happy note I will say “happy are those who work with wood”, and hand you over to Happy, the beaver, he will take you on a journey through the chips of the pioneers, and along that sunset trail that leads back to the old wooden shacks . . . to the axe, the saw, and the trees . . . and to the way it was in the days of old Olaf.

Page 12
PART II –
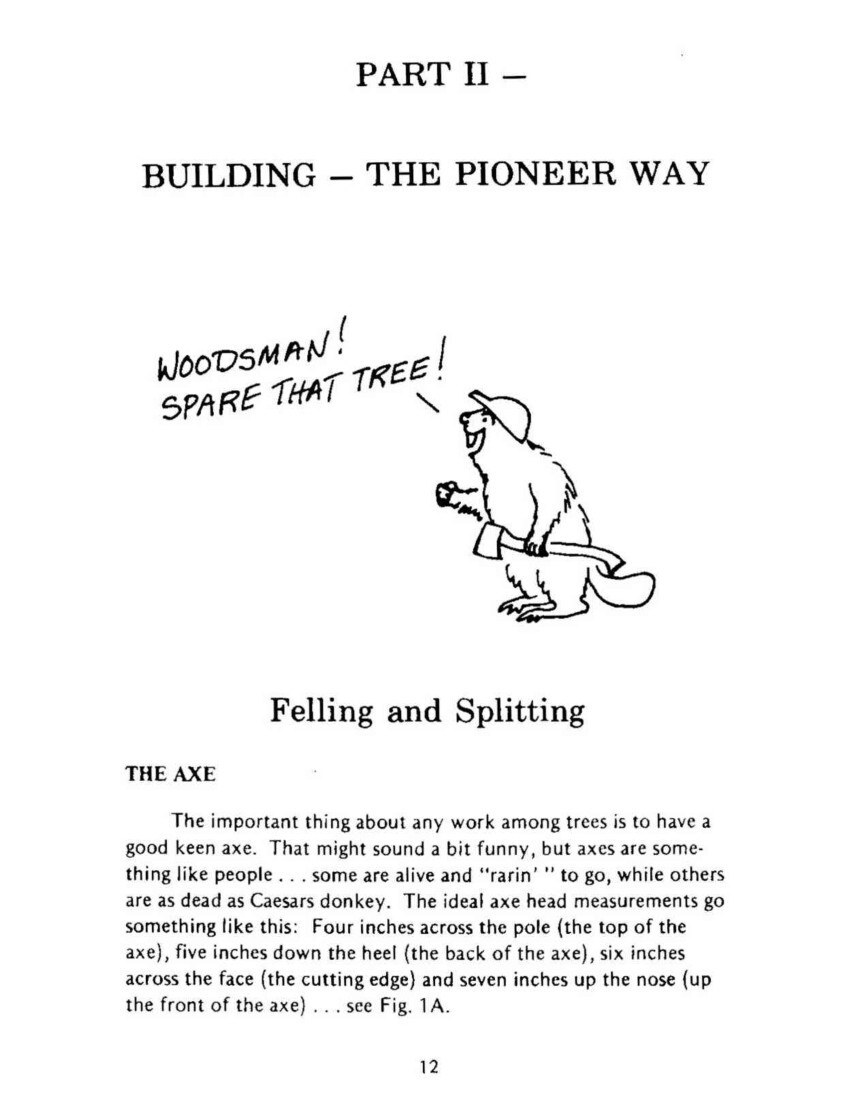
BUILDING – THE PIONEER WAY
WOODSMAN!
SPARE THAT TREE!
Felling and Splitting
THE AXE
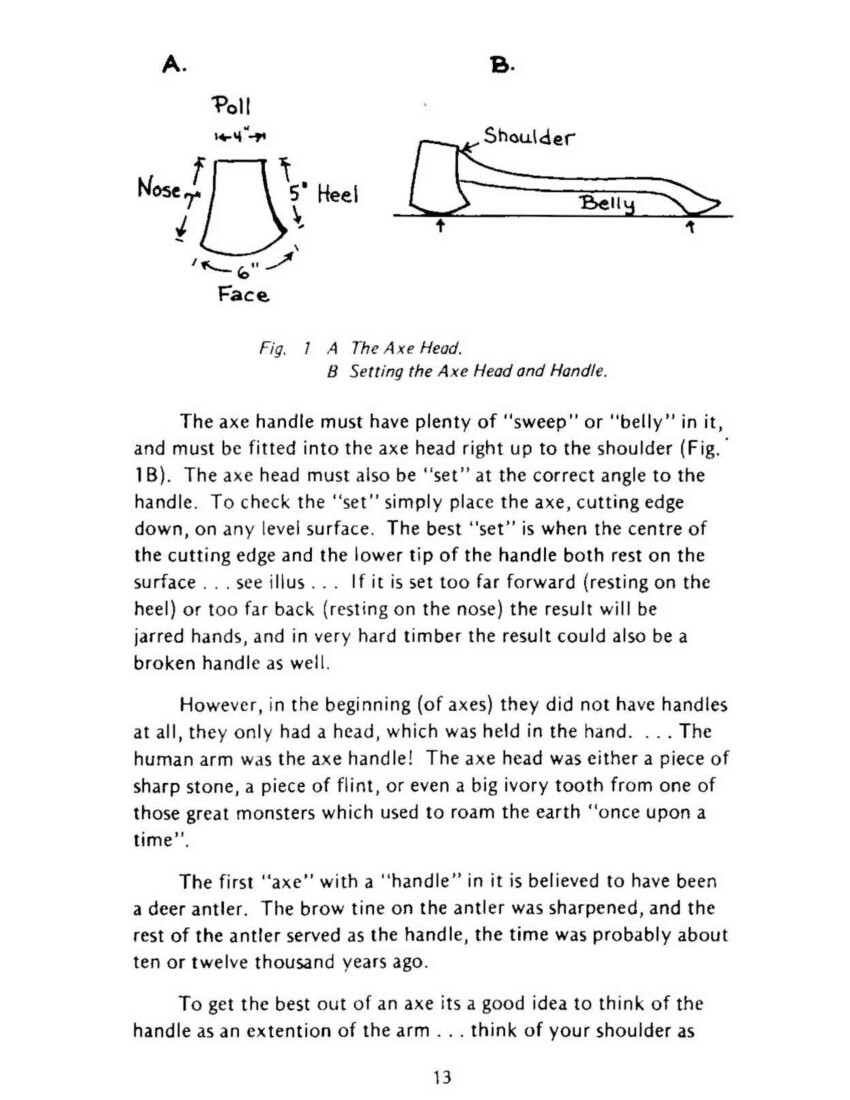
The important thing about any work among trees is to have a good keen axe. That might sound a bit funny, but axes are something like people . . . some are alive and “rarin’” to go, while others are as dead as Caesars donkey. The ideal axe head measurements go something like this: four inches across the pole (the top of the axe), five inches down the heel (the back of the axe), six inches across the face (the cutting edge) and seven inches up the nose (up the front of the axe) . . . See Fig. 1A.

Page 13
Fig. 1 A The Axe Head
B Setting the Axe Head and Handle.
The axe handle must have plenty of “sweep” or “belly” in it, and must be fitted into the axe head right up to the shoulder (Fig. 1B). The axe head must also be “set” simply place the axe, cutting edge down, on any level surface. The best “set” is when the centre of the cutting edge and the lower tip of the handle both rest on the surface . . . see illus . . . If it is set too far forward (resting on the heel) or too far back (resting on the nose) the result will be jarred hands, and in very hard timber the result could be a broken handle as well.
However, in the beginning (of axes) they did not have handles at all, they only had a head, which was held in the hand . . . The human arm was the axe handle! The axe head was either a piece of sharp stone, a piece of flint, or even a big ivory tooth from one of those great monsters which used to roam the earth “once upon a time”.
The first “axe” with a “handle” in it is believed to have been a deer antler. The brow tine on the antler was sharpened, and the rest of the antler served as the handle, the time was probably about ten or twelve thousand years ago.
To get the best out of an axe it’s a good idea to think of the handle as an extension of the arm . . . think of your shoulder as

Page 14
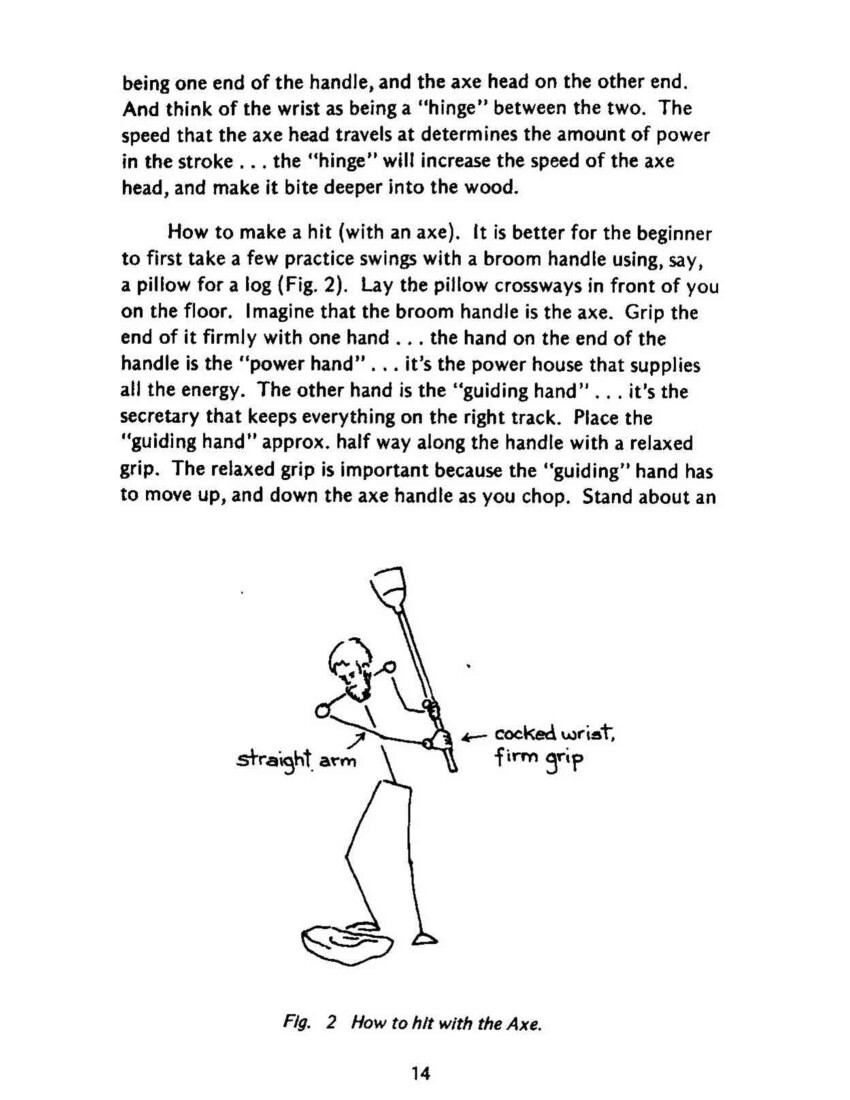
being one end of the handle, and the axe head on the other end. And think of the wrist as being a “hinge” between the two. The speed that the axe head travels at determines the amount of power in the stroke . . . the “hinge” will increase the speed of the axe head, and make it bite deeper into the wood.
How to make a hit (with an axe). It is better for the beginner to first take a few practice swings with a broom handle using say a pillow for a log (Fig. 2). Lay the pillow crossways in front of you on the floor. Imagine that the broom handle is the axe. Grip the end of it firmly with one hand . . . the hand on the end of the handle is the “power hand” . . . it’s the power house that supplies all the energy. The other hand is the “guiding hand” it’s the secretary that keeps everything on the right track. Place the “guiding hand” approx. Half way along the handle with a relaxed grip. The relaxed grip is important because the “guiding” hand has to move up and down the axe handle as you chop. Stand about an
Fig. 2 How to hit with the Axe.

Page 15
arms length away from the pillow, feet well apart, both feet firmly on the ground (floor), and the “axe head” end of the broom handle on the pillow.
Then keeping the “power” arm straight but not rigidly stiff, gently “push” the handle upwards, and away from you. You do the pushing with the shoulder . . . keep the arm straight, and don’t bend the wrist yet . . . push it as far as you comfortably can. At this point stop pushing, and bend the “hinge” (cock the wrist). Good, flexible wrists will add several feet to the length of the stroke. Then on the downward stroke you reverse the procedure by “pulling” the handle back again with the shoulder…wrists still “cocked”. Do not start “un-cocking” until the handle is about halfway back on the return “pull”. Lengthen, still pulling gently, “un-cock” the wrists smartly. The combined force of the pull and the un-cocking together, if you can perfect it, will give you power that you never dreamed was possible . . . but to achieve that power you must maintain a vice-like grip with the “power” hand, and you must keep the “power” arm straight all the way through the stroke.
The guiding hand, with the relaxed grip, will slide, more or less, automatically to and fro along the handle as you chop. It should slide away from you on the push part of the stroke, and towards you on the pull part.
After you have mastered the short “push and pull” stroke you can lengthen it by adding a little body movement. It’s fairly simple. You add it on by slightly twisting the hips after the wrists have been “cocked” . . . but keep both feet firmly on the round and both eyes “glued” to the exact spot that you want to hit. On the return movement first “unwind” the hips, next the gentle pull with the shoulder, and finally the un-cocking of the wrists, this must be done with snap, and vim! And never take your eyes off the exact spot that you intend to hit . . . you don’t just look at it . . . you must glare at it with all the venom that you can muster, and actually “will” the cutting edge to go exactly where you want it to go! If you can master the axe it will be a big help in

Page 16
building your shingle shack because that will enable you to slit and trim your own framework timber, pioneer style, . . . but a chainsaw would probably be easier for that part of the job.
Don’t worry too much about looking for the ideal axe… because you will probably never find it. Technology hasn’t done much for the axe. Today’s axe is usually a long faced, gutless thing, too flat across the face, and fitted too far out on the end of the handle. You can’t do much about the handle, unless you remove it from the head, and refit it right up to the shoulder. But that is a fairly major sort of job for a beginner. However, you can with a grind stone and a little care, soon deal with the flat face and at the same time grind the correct “set” onto the axe head.
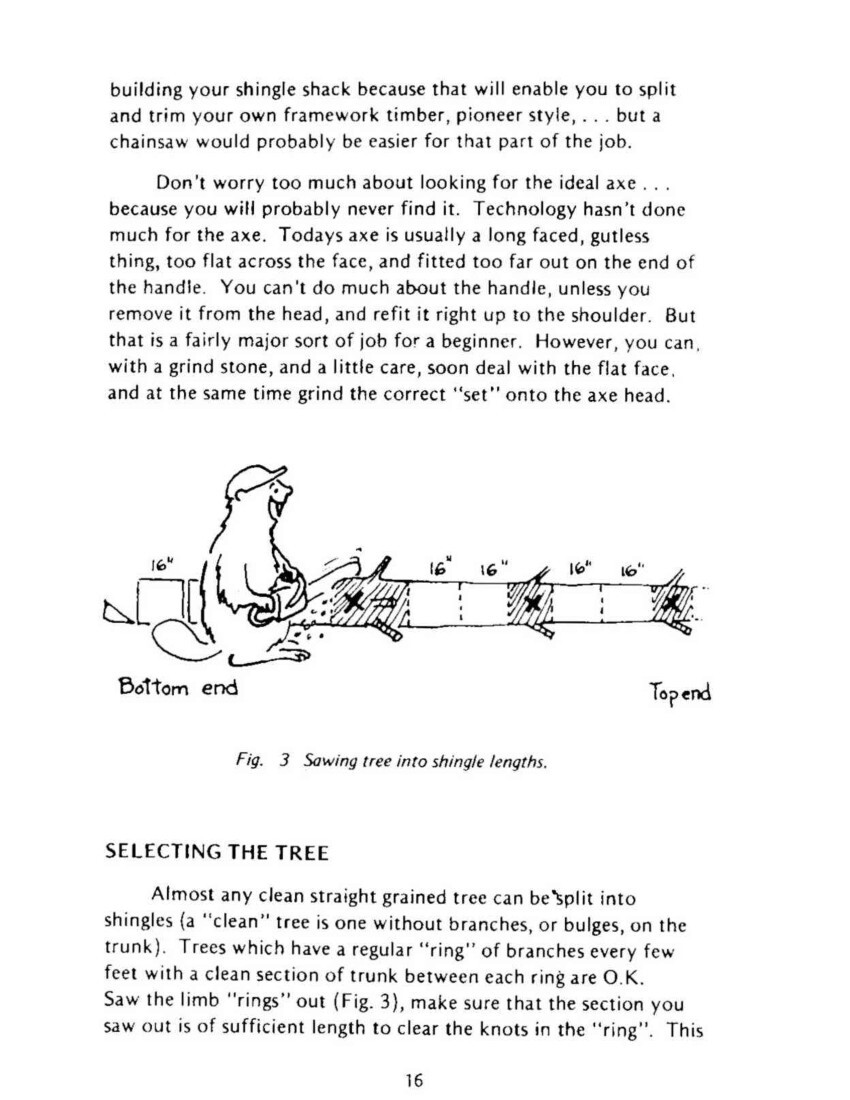
Fig. 3 Sawing tree into shingle lengths.
SELECTING THE TREE
Almost any clean straight grained tree can be split into shingles (a “clean” tree is one without branches, or bulges, on the trunk). Trees which have a regular “ring” of branches every few feet with a clean section of trunk between each ring are O.K. Saw the limb “rings” out (Fig. 3), make sure that the section you saw out is of sufficient length to clear the knots in the “ring”. This

Page 17
sort of tree takes a lot more sawing, but in these days of chainsaws that’s no great problem, and besides that the knotty sections make good fire wood.
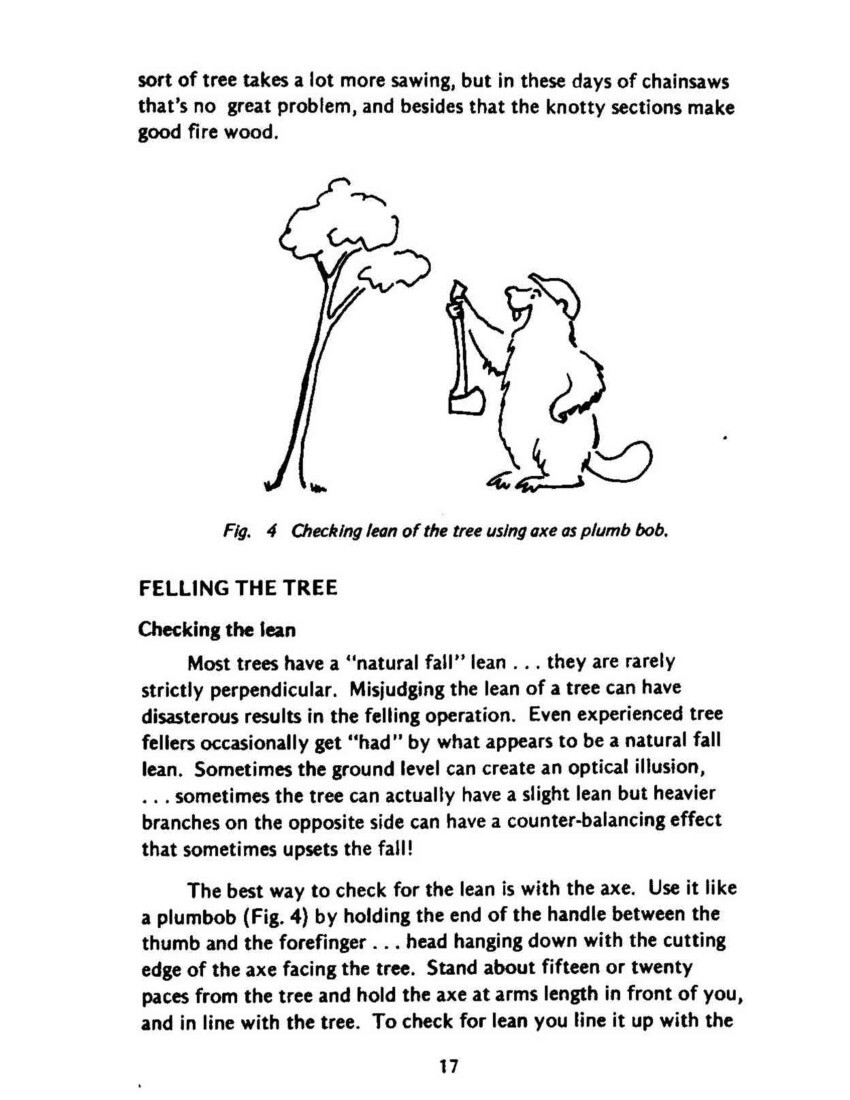
Fig. 4. Checking lean of the tree using axe as a plumb bob.
FELLING THE TREE
Checking the lean
Most trees have a “natural fall” lean . . . they are rarely strictly perpendicular. Misjudging the lean of a tree can have disastrous results in the felling operation. Even experienced tree fellers occasionally get “had” by what appears to be a natural fall lean. Sometimes the ground level can create an optical illusion, . . . sometimes the tree can actually have a slight lean but heavier branches on the opposite side can have a counter-balancing effect that sometimes upsets the fall!
The best way to check for the lean is with the axe. Use it like a plumbob (Fig. 4) by holding the end of the handle between the thumb and the forefinger . . . head hanging down with the cutting edge of the axe facing the tree. Stand about fifteen or twenty paces from the tree and hold the axe at arm length in front of you and in line with the tree. To check for lean you line it up with the

Page 18
side of the tree. And to check for limb weight you line up with the centre of the tree. It’s a good idea to check from several different angles.
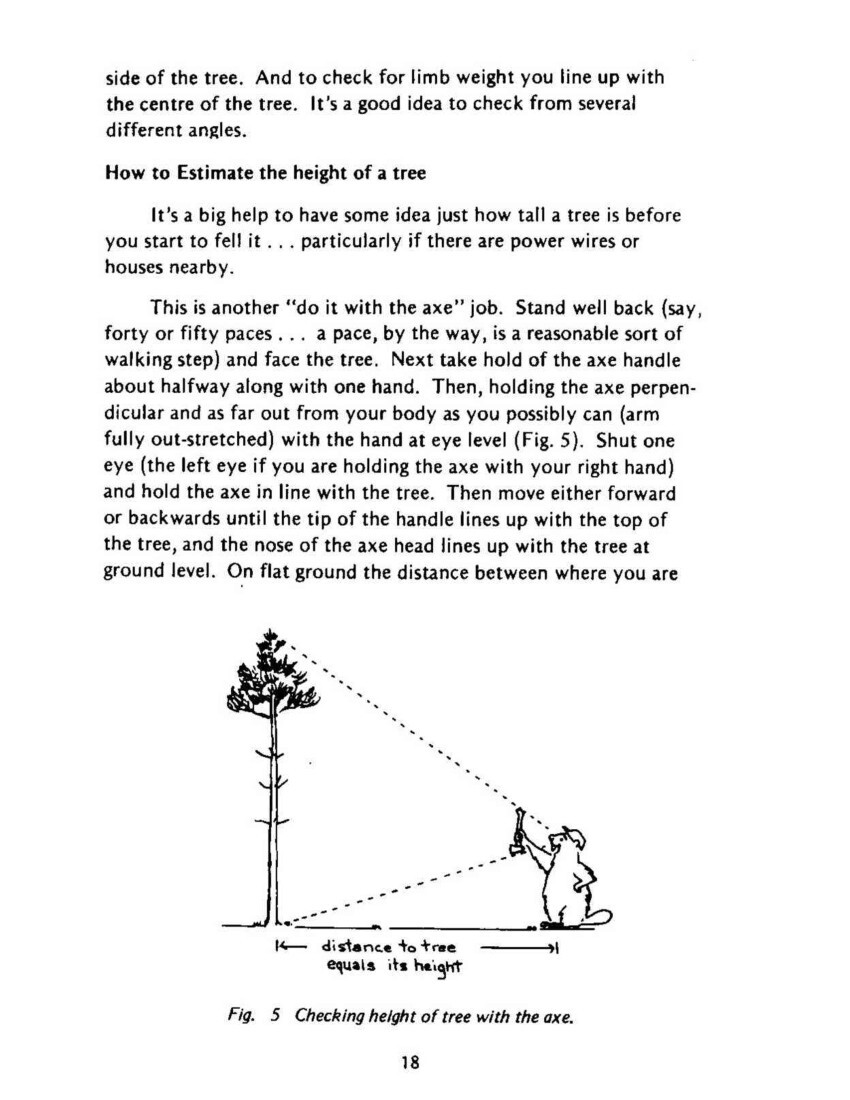
How to Estimate the height of a tree
It’s a big help to have some idea just how tall a tree is before you start to fell it . . . particularly if there are power wires or houses nearby.
This is another “do it with the axe” job. Stand well back (say forty or fifty paces . . . a pace, by the way, is a reasonable sort of walking step) and face the tree. Next take hold of the axe handle about halfway along with one hand. Then, holding the axe perpendicular and as far out from your body as you possibly can (arm fully out-stretched) with the hand at eye level (Fig. 5). Shut one eye (the left eye if you are holding the axe with your right hand) and hold the axe in line with the tree. Then move either forward or backwards until the tip of the handle lines up with the top of the tree, and the nose of the axe head lines up with the tree at ground level. On flat ground the distance between where you are
Fig. 5 Checking height of tree with the axe .

Page 19
standing and the base of the tree roughly equals the height of the tree. Providing, of course that you have a normal length arm, and are using a standard thirty two inch (810 mm) axe handle. With a bit of practice you will be able to estimate the height within a few inches. If the ground is sloping, and you are standing on the lower side of the tree you will over estimate the height. And if you are standing on the higher side of the tree you will under estimate the height. If the ground has a big slope (the side of a hill) it’s best to hunt around till you find somewhere to stand that is approximately the same level as the base of the tree.
Felling the tree
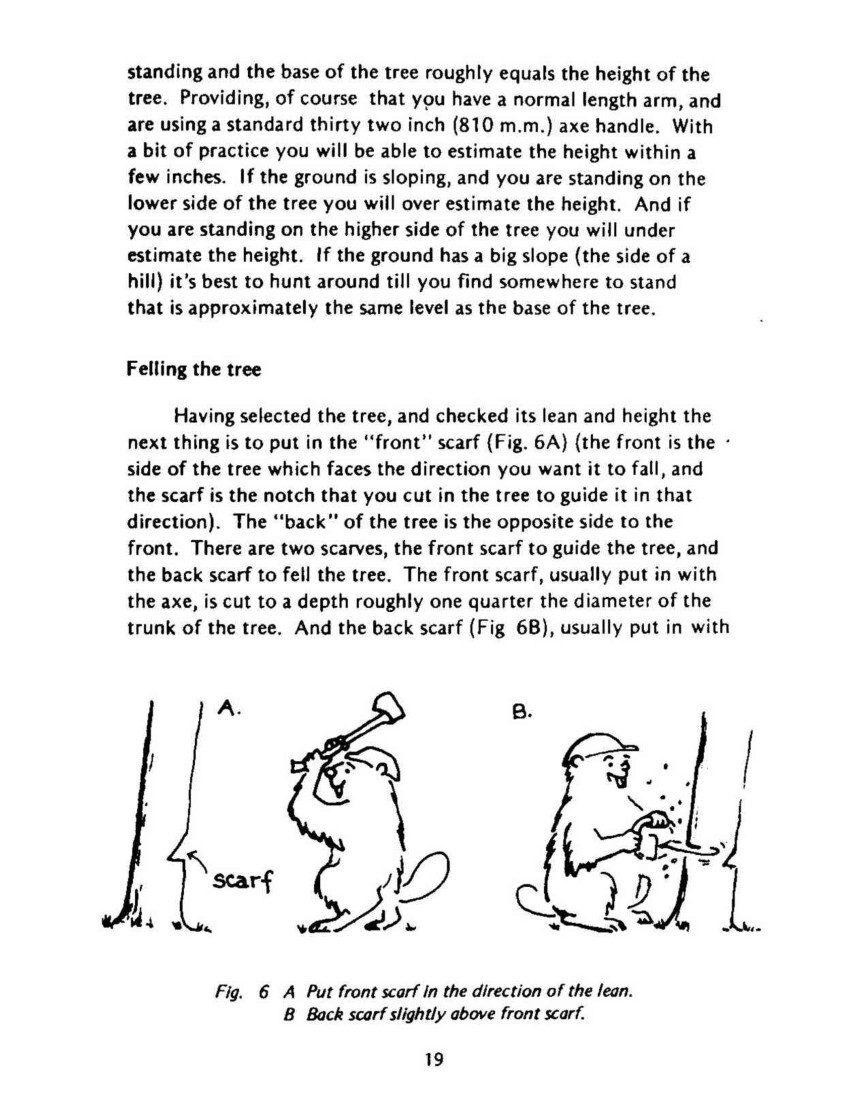
Having selected the tree, and checked its lean and height the next thing is to put in the “front” scarf (Fig. 6A) (the front is the side of the tree which faces the direction you want it to fall, and the scarf is the notch that you cut in the tree to guide it in that direction). The “back” of the tree is the opposite side to the front. There are two scarves, the front scarf to guide the tree, and the back scarf to fell the tree. The front scarf, usually put in with the axe, is cut to a depth roughly one quarter the diameter of the trunk of the tree. And the back scarf (Fig. 6B), usually put in with
Fig. 6 A Put front scarf in the direction of the lean
B Back scarf slightly above front scarf.

Page 20
the saw, must be at least three inches higher (up the tree) than the front scarf. Always fell the tree in the direction that it leans . . . But be very careful with a tree that has a lot of lean . . . it can be dangerous! You have two options with a tree that has a lot of lean . . . the first is that you must put in a very big front scarf (more than halfway through the tree) or else you can leave the tree strictly alone. Leaving it stand is probably the better idea of the two because a tree with a big lean is usually a fairly tough one to split!
It’s a good idea to have a maul (wooden mallet) (Fig. 22) with you when felling a tree, because a slight breeze in the wrong direction can push the tree back onto your saw (during felling operation) and jam it . . . sometimes a slight miscalculation in the lean of the tree can cause the saw cut to “pinch” the saw. In either case place the cutting edge of the axe in the saw cut (at the widest part of the tree) and tap (hit) it gently with the maul. If the axe “jumps” out try putting a bit of dry dirt (soil) on the blade to give it a grip. If it still jumps out make a wooden glut (wedge) with a fairly thin taper, rub it into the dirt (to give it a grip) and “start” it into the saw cut, then put the axe in along side of it. Gently tap each one alternatively (this will prise the cut open) . . . guaranteed to work! The wooden glut is a much better gadget than the steel wedge . . . it’s a much more friendly ally because it doesn’t damage your gear if you accidentally strike it.
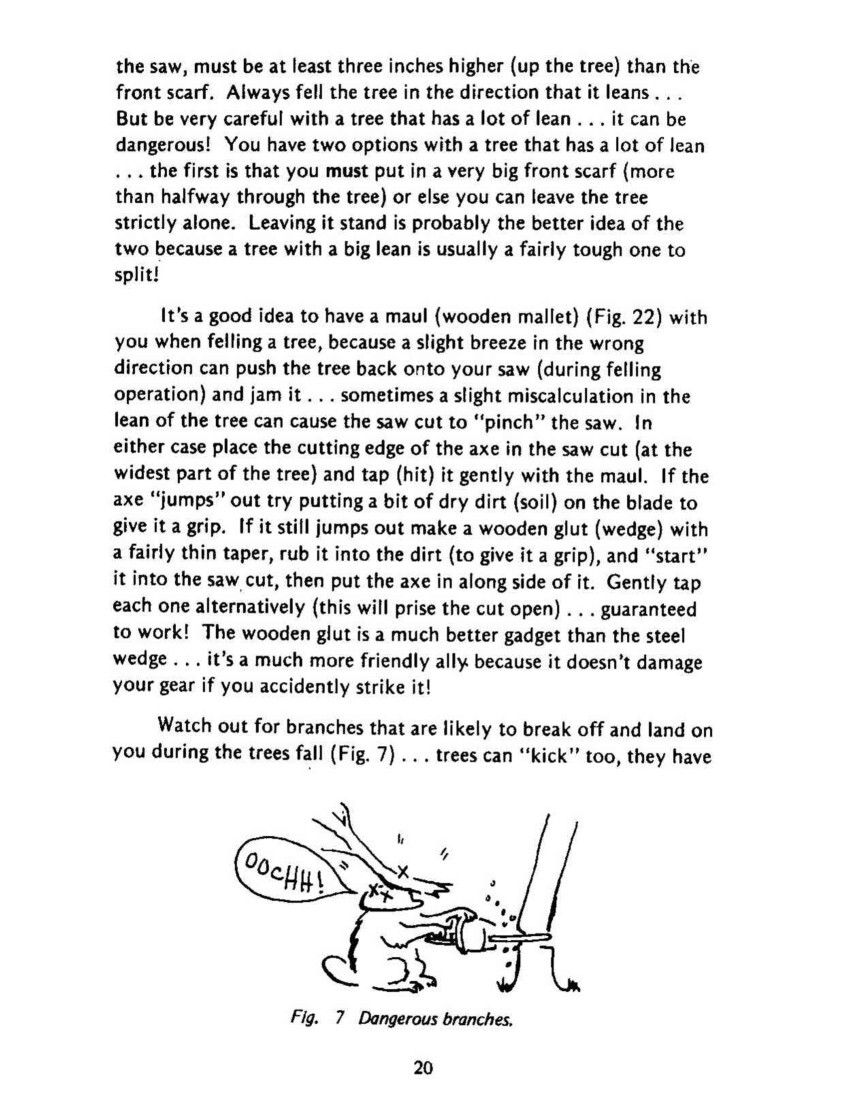
Watch out for branches that are likely to break off and land on you during the trees fall. (Fig. 7) . . . trees can “kick” too, they have
Fig. 7 Dangerous branches.

Page 21
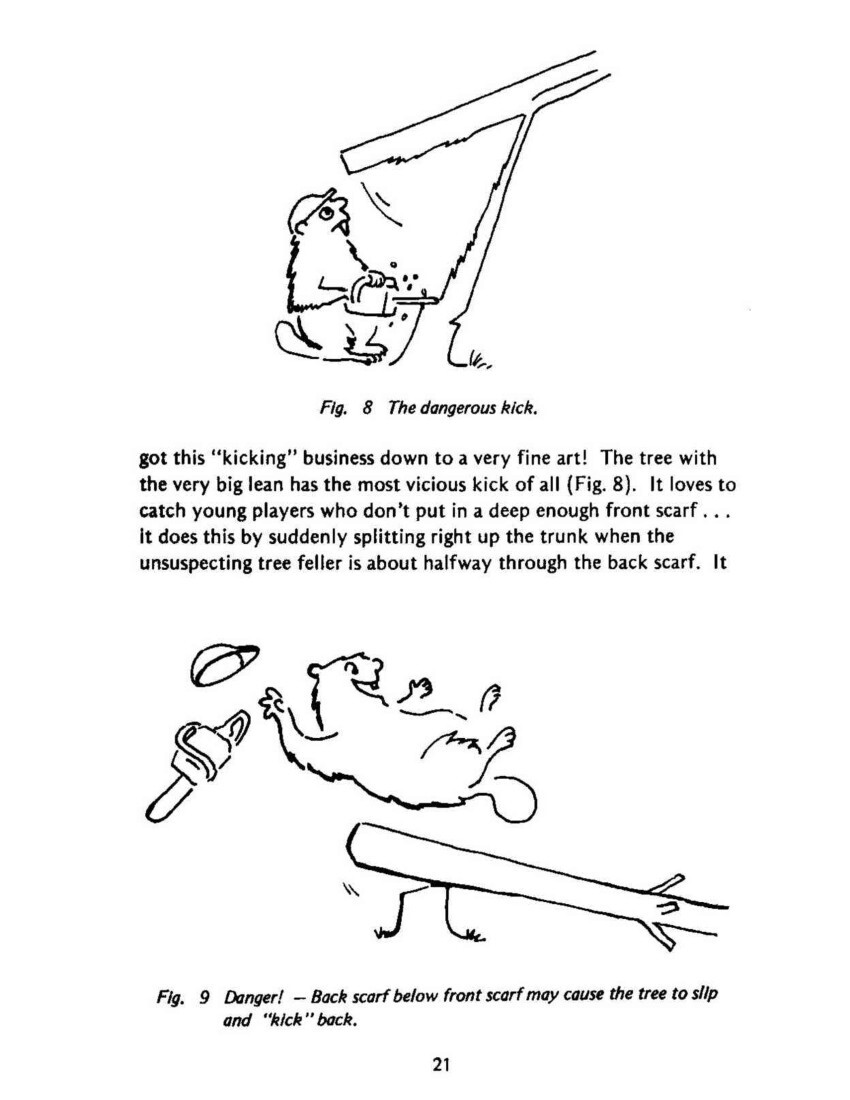
Fig. 8 The dangerous kick
got this “kicking” business down to a very fine art! The tree with the very big lean has the most vicious kick of all (Fig. 8). It loves to catch young players who don’t put in a deep enough front scarf . . . it does this by suddenly splitting right up the trunk when the unsuspecting tree feller is about halfway through the back scarf. It
Fig. 9 Danger! – Back scarf below front scarf may cause the tree to slip and “kick” back.

Page 22
happens with the suddenness, and noise of a rifle shot. The split half jumps high into the air, and lands with a mighty crash. It’s all over and finished, in a few seconds, when I was a kid I seen a bushman get killed with that sort of kick. It was one of those object lessons that really got the message across!
Another little “trick of the kick” happens when the beginner puts his back scarf below the level of the front scarf (Fig. 9). This can cause the falling tree to skid back across the top of the stump, the further it skids across the stump the bigger the kick, because the stump acts as a fulcrum, and throws the butt end of the tree into the air when the top end hits the ground! This is one of the trees’ more playful kicks, and rarely does much injury to the tree feller (hurts his pride perhaps). Even if it does “catch” him it rarely throws him very far!
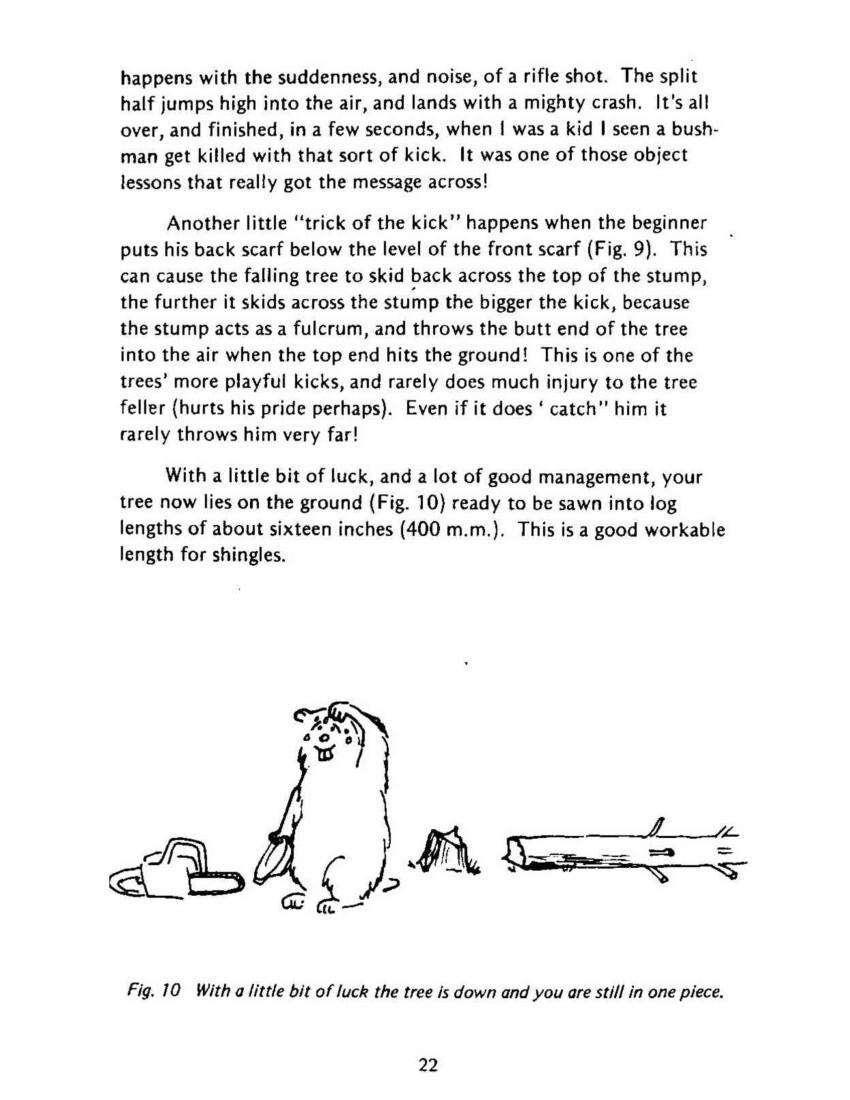
With a little bit of luck, and a lot of good management, your tree now lies on the ground (Fig. 10) ready to be sawn into log lengths of about sixteen inches (400 mm). This is a good workable length for shingles.
Fig. 10 With a little bit of luck the tree is down and you are still in one piece.

Page 23
SPLITTING THE LOGS
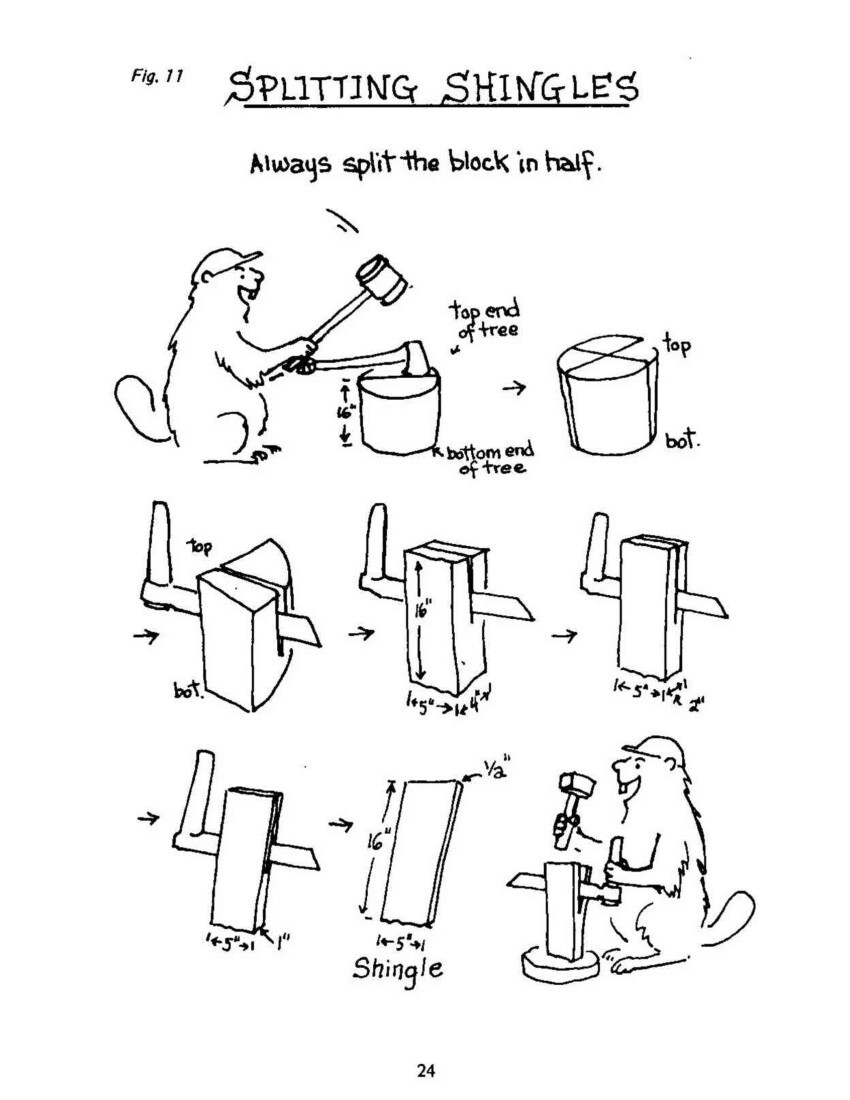
It is important to carefully mark the top ends of the logs as soon as you saw them (Fig. 3). The top end is the end that was nearest the top of the tree. Always split the timber in the opposite direction to which the tree grew, i.e. from top to bottom. They split better that way. That was the splitting method handed down by the ancients who always worked with, and never against, Nature.
Begin by splitting the log exactly in half (Fig. 11). But first stand the log on a solid base, “top” end up, then draw a straight line right across the centre of the top end. Next take the axe in one hand, and the wooden mallet in the other hand. And then with the marked limb running directly away from you place the cutting edge of the axe firmly on the far end of the line. Then hit the axe head firmly, but gently, with the wooden mallet. Next lift the axe out of the timber, and move it one width of the blade nearer to you, and hit it again. Repeat the process until you have made a groove with the axe right across the log on the marked line.
Keep on repeating the process, each time hit the axe a little bit harder until the log finally falls apart in two equal halves. The old-time secret of success in timber splitting was to split the timber into equal halves . . . from the first split of the log right through to the final splitting of the two shingles.
The reason for making equal halves means that there is an equal pressure of timber on both sides of the splitting tool. This ensures that the split will follow the timber grain in a true line, and is not so likely to run off owing to more pressure on one side that the other.
The log is now in two halves, so halve it again, this time use the shingle knife (coopers froe) (Fig. 25) and the wooden mallet. You will now have four quarters, and it’s time for you to have a good think about how you are going to divide them into multiples of two (equal halves). At this point I should mention that the best


Page 25
shingles are made by splitting them at right angles to the growth rings of the tree. This is not always possible, but you should be able to manage it most of the time. Splitting at right angles to the growth rings (across them) is known as “quartering”, and splitting “with” (along) the growth rings is known as “backing”. Shingles that have been “backed” off will usually crack when exposed to the weather, and should never be used on the roof. They are O.K. on the north wall in the southern hemisphere, and the south wall in the northern hemisphere (the “good weather side of the house).
Supposing you would like to make shingles, say, half an inch thick (12 mm) by five inches wide (125 mm), you would try to divide each of the four quarters into blocks five inches wide by four inches thick with the growth rings across the four inch way. Then splitting it the five inch way, you divide it into two equal halves. This will give you two blocks, each five inches wide by two inches thick. Split them both into equal halves, and this will give you four blocks each five inches wide by one inch thick. Then split the four of them into equal halves, and this will give you eight shingles, and with a bit of luck, each one of them will be half an inch thick, and five inches wide with the growth rings running in the right direction. (See Fig. 11)
The old-timers called this method “splitting ‘em in books of eight”.
It’s not a good idea to split all your shingles exactly the same width . . . they will make your shack look too “mechanical” . . . vary the width quite a bit, and you’ll be much happier with the final result.
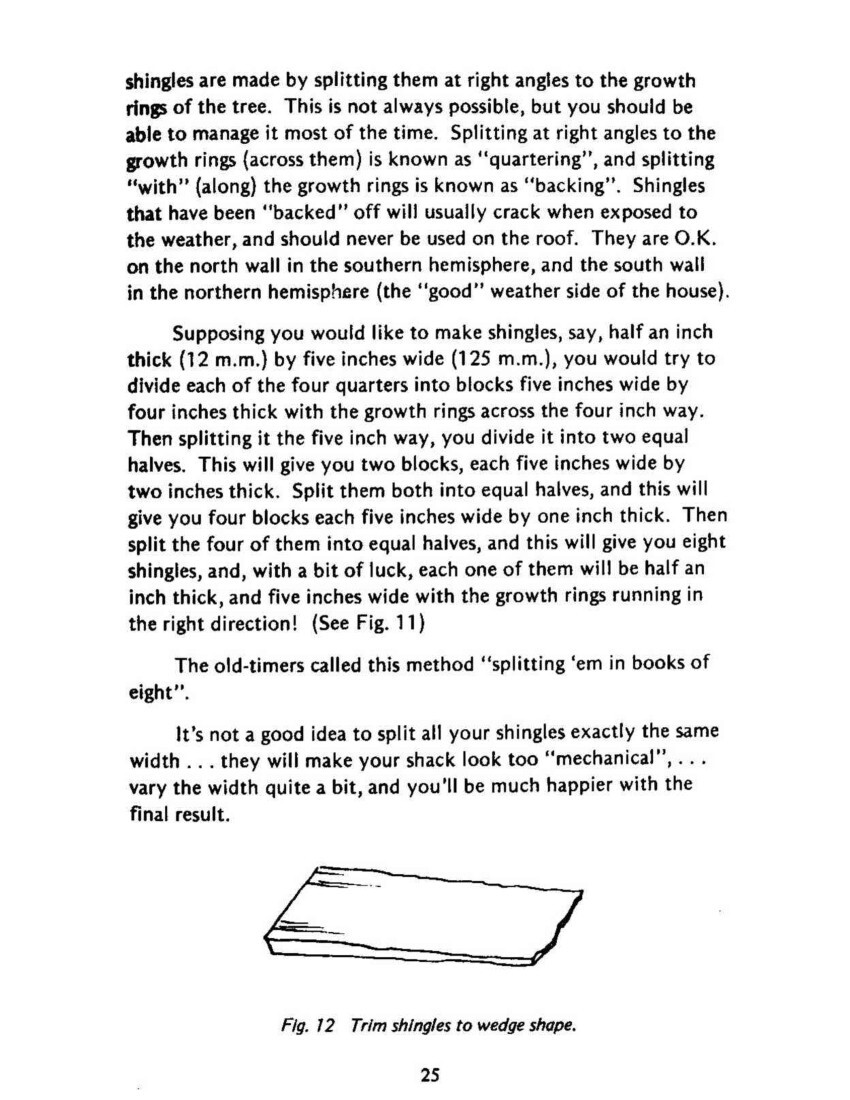
Fig. 12 Trim shingles to wedge shape.

Page 26
Remember too, that all the shingles must be split from top to bottom. After the first split the top is easily recognised because it is the end with the clean, sharp edges where the shingle knife has “bitten” into it, the bottom end is a little ragged at the edges. (Fig. 12).
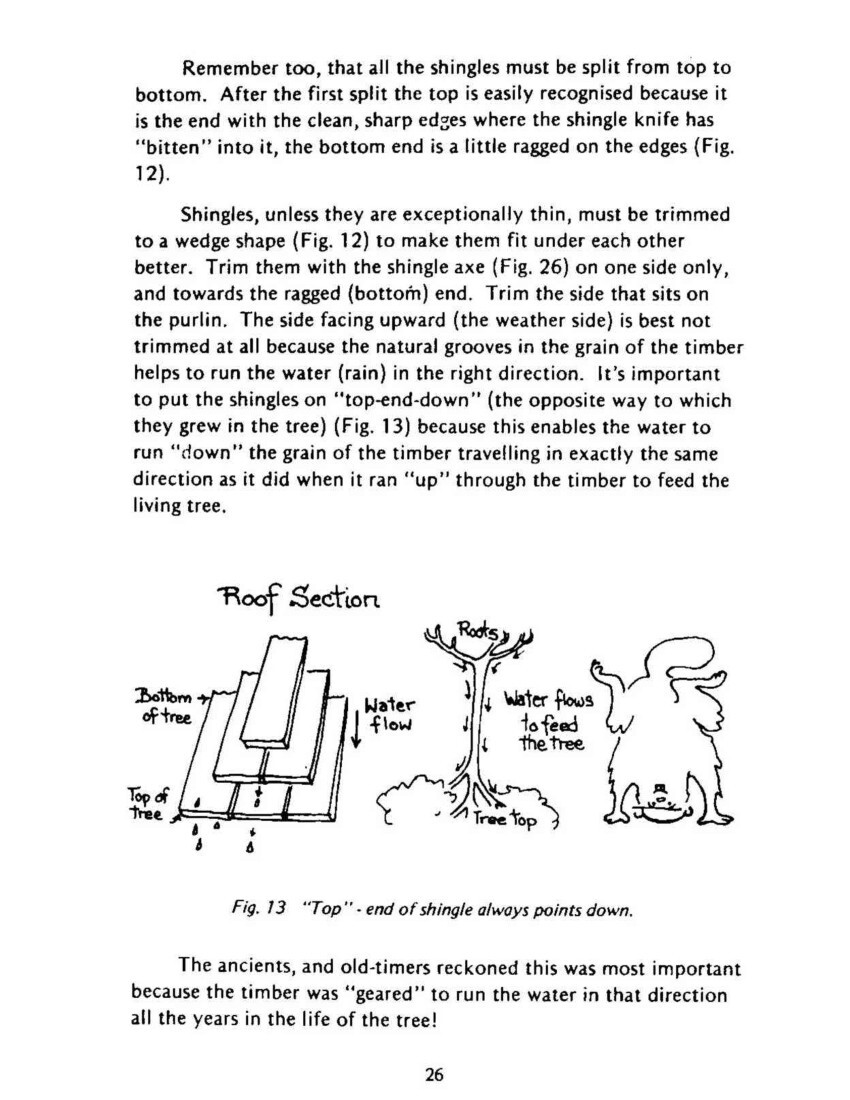
Shingles, unless they are exceptionally thin, must be trimmed to a wedge shape (Fig 12) to make them fit under each other better. Trim them with the shingle axe (Fig. 26) on one side only, and towards the ragged (bottom) end. Trim the side that sits on the purlin. The side facing upward (the weather side) is best not trimmed at all because the natural grooves in the grain of the timber helps to run the water (rain) in the right direction. It’s important to put the shingles on “top-end-down” (the opposite way to which they grew in the tree) (Fig. 13) because this enables the water to run “down” the grain of the timber travelling in exactly the same direction as it did when it ran “up” through the timber to feed the living tree.
Fig 13. “Top” – end of shingle always points down.
The ancients, and old-timers reckoned this was most important because the timber was “geared” to run the water in that direction all the years in the life of the tree!

Page 27
According to them the tree would never absorb water travelling in that direction . . . it would send the water onward and upward to feed all its twigs and leaves way up top.
This was one of the “secrets” of timber that died with the old-timers. Their roofs never needed painting or preserving, yet they lasted, in some cases, for hundreds of years.
. . . Even the old-time ship builders, who made their ships masts from tall trees always trimmed the tees in such a way that enabled them to erect the mast “roots” end up.
Building the Shingle Shack
FRAMING
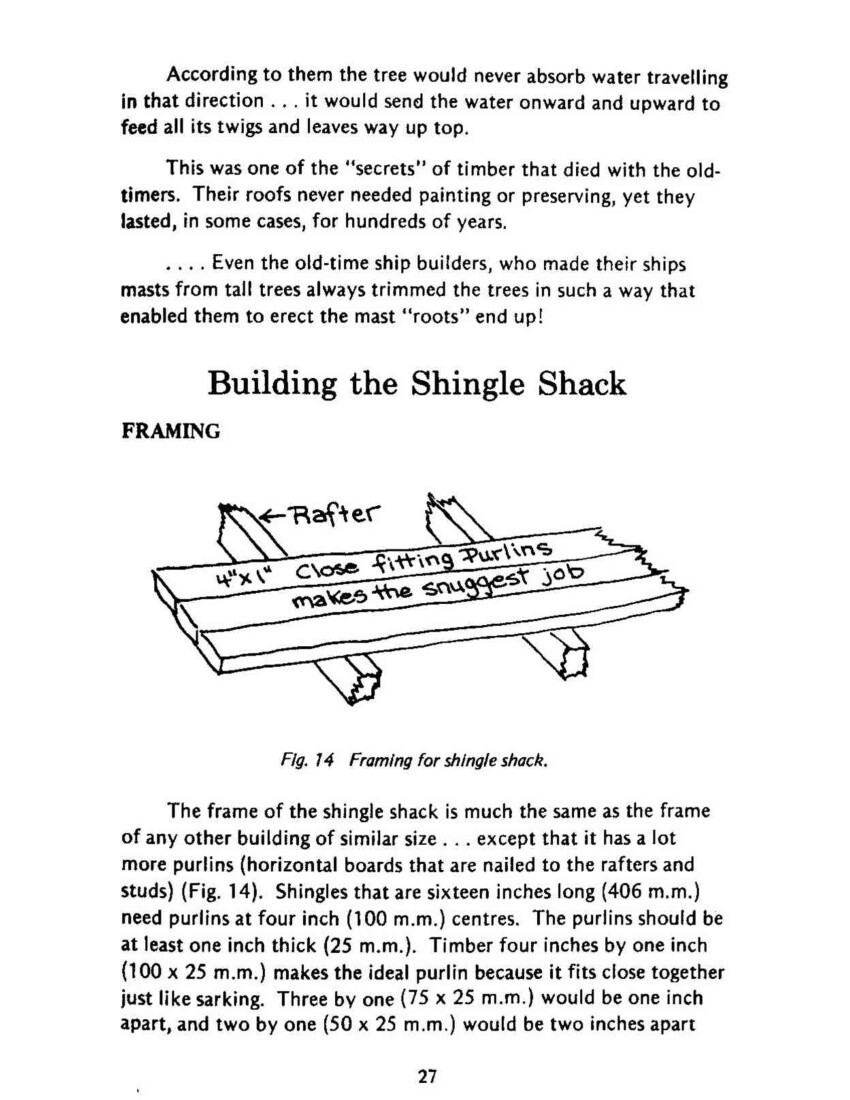
Fig. 14 Framing for shingle shack.
The frame of the shingle shack is much the same as the frame of any other building of similar size . . . except that it has a lot more purlins (horizontal boards that are nailed to the rafters and studs) (Fig. 14). Shingles that are sixteen inches long (406m.m.) need purlins at four inch (100 m.m.) centres. The purlins should be at least one inch thick (25m.m.). Timber four inches by one inch (100 x 25 m.m.) makes the ideal purlin because it fits close together just like sarking. Three by one (75 x 25 m.m.) would be one inch apart, and two by one (50 x 25 m.m.) would be two inches apart

Page 28
Any of those boards are O.K., but the four by one makes the snuggest job.
Three by two (75 x 50 m.m.) rafters and studs would be O.K. for a medium sized shack of say, eight feet by ten feet with a high pitched roof, and a six foot stud. Even lighter timber than that would be alright on a small shack . . . but first check with your local building inspector.
Studs and rafters should be somewhere around eighteen inches to twenty four inches apart (450 to 600 m.m.) or whatever the regulations say in your area. But it is always wise to have too many studs and rafters than not enough . . . if you are doing the job yourself it is time well spent.
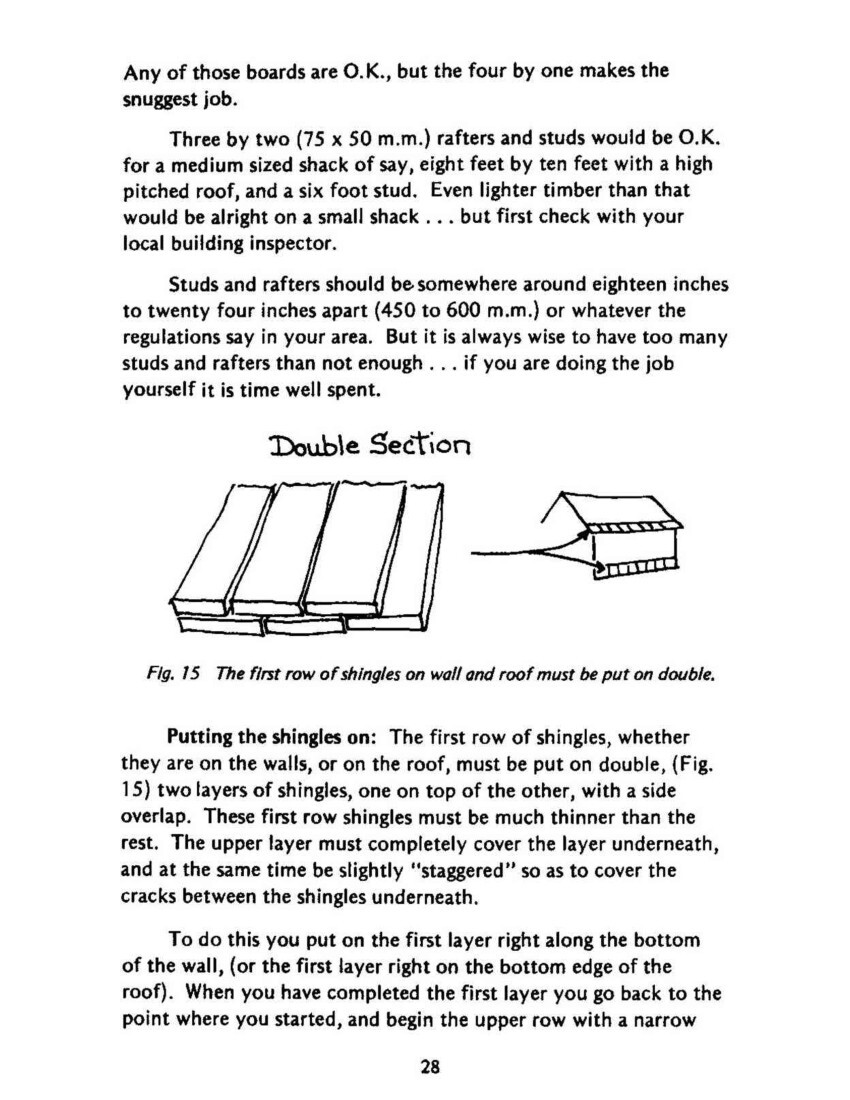
Fig 15 The first row of shingles on wall and roof must be put on double.
Putting the shingles on: The first row of shingles, whether they are on the walls, or on the roof, must be put on double. (Fig. 15) two layers of shingles, one on top of the other, with a side overlap. These first row shingles must be much thinner than the rest. The upper layer must completely cover the layer underneath and at the same time be slightly “staggered” so as to cove the cracks between the shingles underneath.
To do this you put on the first layer right along the bottom of the wall (or the first layer right on the bottom edge of the roof). When you have completed the first layer you go back to the point where you started, and begin the upper row with a narrow

Page 29
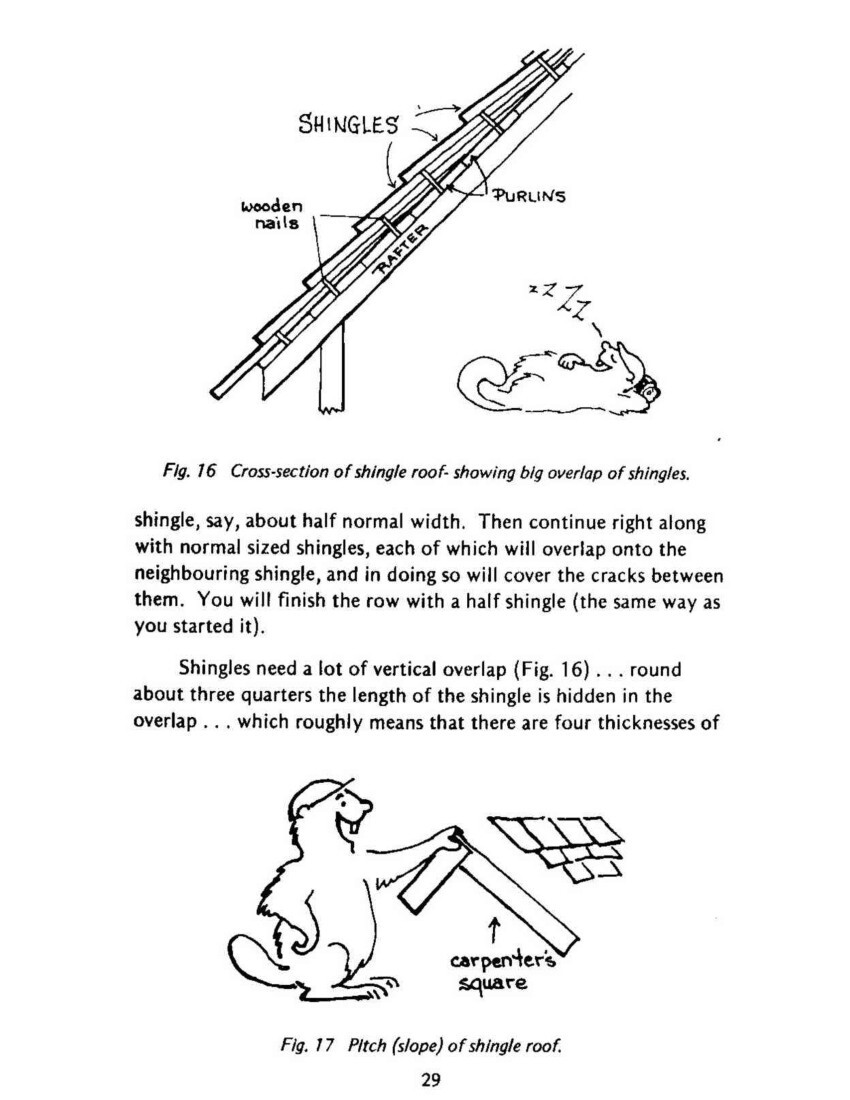
Fig. 16 Cross-section of shingle roof – showing big overlap of shingles.
shingle, say, about half normal width. Then continue right along with normal sized shingles, each of which will overlap onto the neighbouring shingle, and in doing so will cover the cracks between them. You will finish the row with a half shingle (the same way as you started it).
Shingles need a lot of vertical overlap (Fig. 16) . . . round about three quarters the length of the shingle is hidden in the overlap . . . which roughly means that there are four thicknesses of
Fig. 17 Pitch (slope) of shingle roof.

Page 30
shingles over the entire roof. This not only ensures a leak proof roof, it also provides excellent insulation as well.
The pitch (degree of slope) on a shingle roof is important. It has to be fairly steep. One way to get the right slope is to hold a carpenters square by the apex (corner) with both its “legs” hanging down. (Fig. 17). The angle of slope on the “legs” is near enough to the right pitch for a shingle roof.
MAKING AND USING WOODEN NAILS
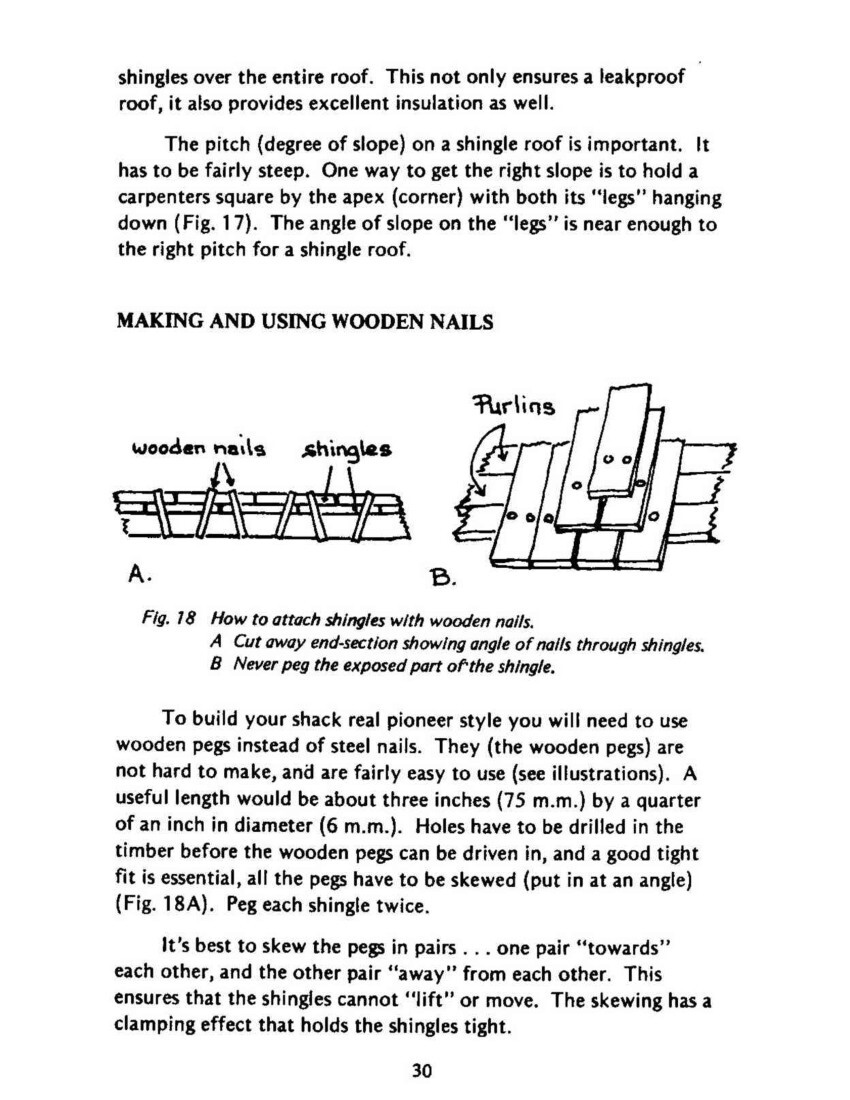
Fig. 18 How to attach shingles with wooden nails.
A Cut away end-section showing angle of nails through shingles.
B Never peg the exposed part of the shingle.
To build your shack real pioneer style you will need to use wooden pegs instead of steel nails. They (the wooden pegs) are not hard to make, and are fairly easy to use (see illustrations). A useful length would be about three inches (75 m.m.) by a quarter of an inch in diameter (6 m.m.). Holes have to be drilled in the timber before the wooden pegs can be driven in, and a good tight fit is essential, all the pegs have to be skewed (put in at an angle) (Fig. 18A). Peg each shingle twice.
It’s best to skew the pegs in pairs…one pair “towards” each other, and the other pair “away” from each other. This ensures that the shingles cannot “lift” or move. The skewing has a clamping effect that holds the shingles tight.

Page 31
Never peg the exposed part of the shingle (Fig. 18B) . . . all the pegs are completely hidden by the next row of shingles.
The old-timers dipped the peg into a mixture of red lead and linseed oil before they drove it in. This had a two-fold effect, the peg slipped into the hole better, and when the red lead “set” it helped to hold the peg in place. But today it would be a better idea to dip the peg into quick stetting waterproof glue.
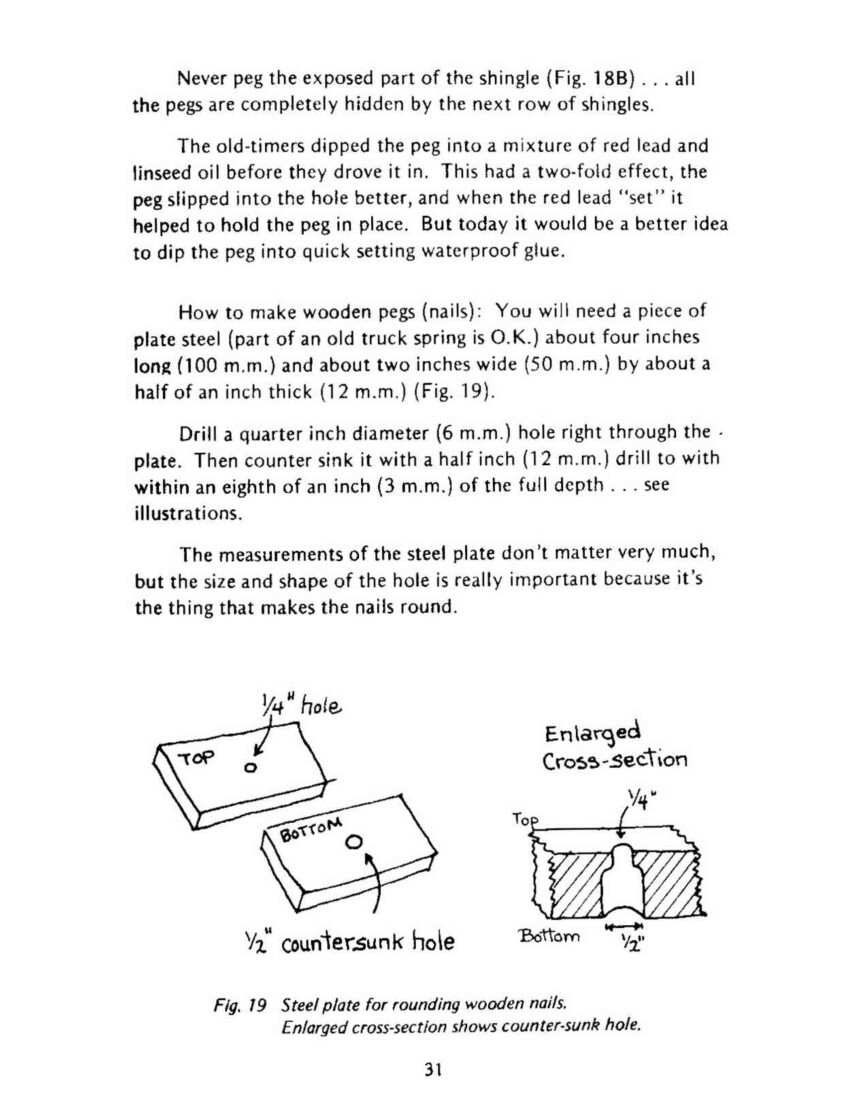
How to make wooden pegs (nails): You will need a piece of plate steel (part of an old truck spring is O.K.) about four inches long (100 m.m.) and about two inches wide (50 m.m.) by about half an inch thick (12 m.m.) (Fig. 19).
Drill a quarter inch diameter (6 m.m.) hole right through the plate. Then counter sink it with a half inch (12 m.m.) drill to [with] within an eighth of an inch (3 m.m.) of the full depth . . . see illustrations.
The measurements of the steel plate don’t matter very much, but the size and shape of the hole is really important because its the thing that makes the nails round.
Fig 19 Steel plate for rounding wooden nails
Enlarged cross-section shows counter-sunk hole.

Page 32
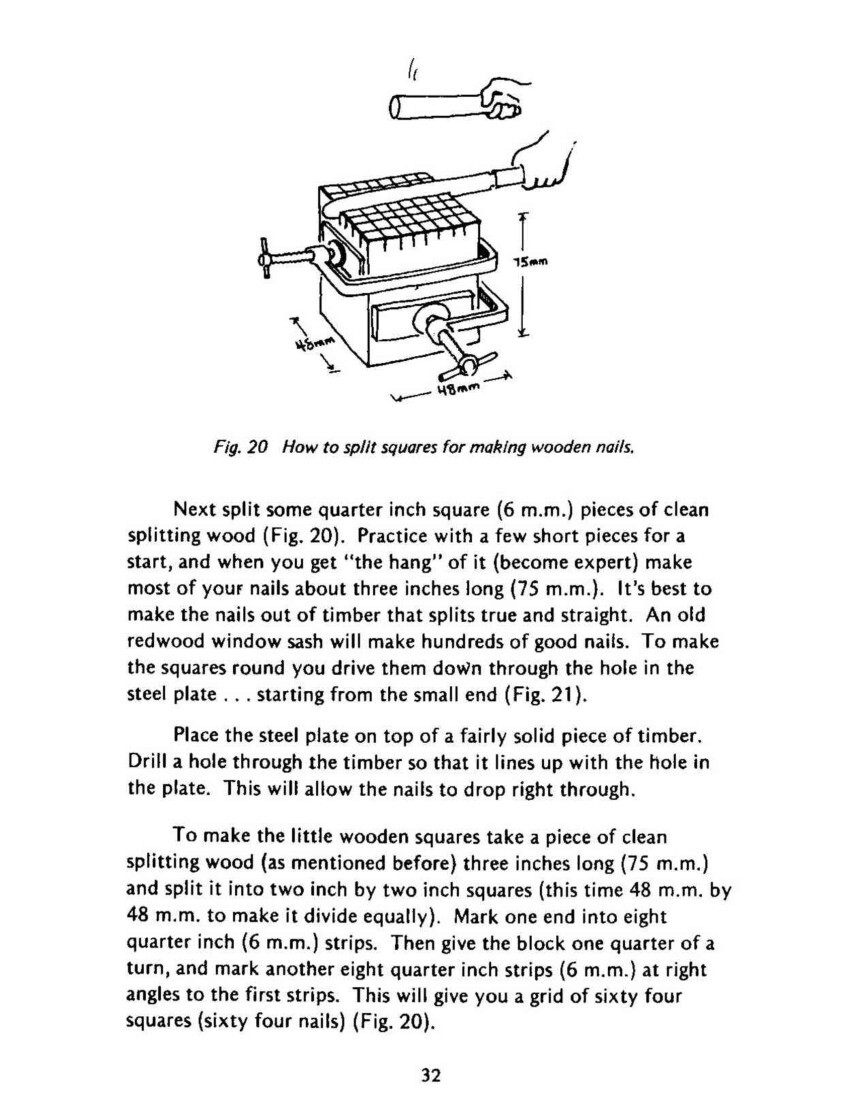
Fig. 20 How to split squares for making wooden nails.
Next split some quarter inch square (6 m.m.) pieces of clean splitting wood (Fig. 20). Practice with a few short pieces for a start, and when you get “the hang” of it (become expert) make most of your nails about three inches long (75 m.m.). Its best the make the nails out of timber that splits true and straight. An old redwood window sash will make hundreds of good nails. To make the square round you drive them down through the hole in the steel plate . . . starting from the small end (Fig. 21).
Place the steel plate on top of a fairly solid piece of timber. Drill a hole through the timber so that it lines up with the hole in the plate. This will allow the nails to drop right through.
To make the little wooden squares take a piece of clean splitting wood (as mentioned before) three inches long (75 m.m.) and split it into two inch by two inch squares (this time 48 m.m.) by 48 m.m. to make it divide equally. Mark one end into eight quarter inch (6 m.m.) strips. Then give the block one quarter of a turn, and mark another eight quarter inch strips (6 m.m.) at right angles to the first strips. This will give you a grid of sixty four squares (sixty four nails). (Fig. 20).

Page 33
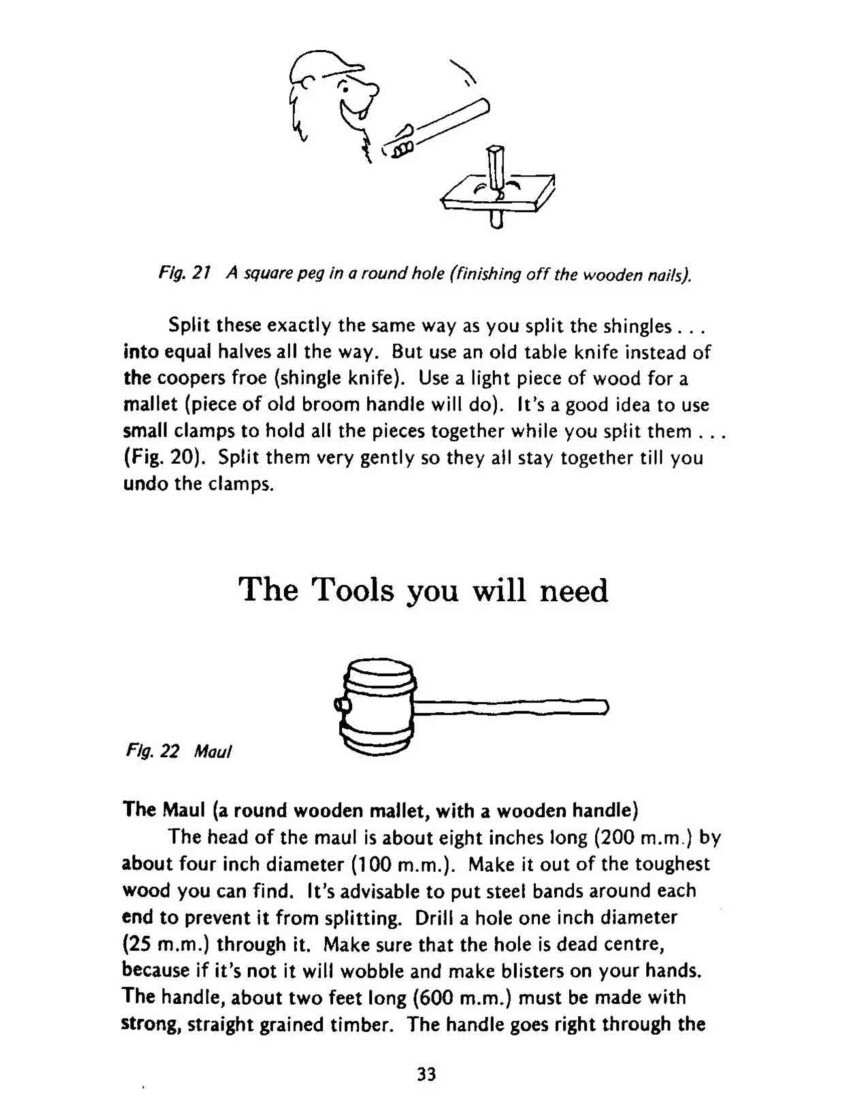
Fig 21 A square peg in a round hole (finishing off the wooden nails).
Split these exactly the same way as you split the shingles . . . into equal halves all the way. But use an old table knife instead of the coopers froe (shingle knife). Use a light piece of wood for a mallet (piece of old broom handle will do). It’s a good idea to use small clamps to hold all the pieces together while you split them . . . (Fig. 20). Split them very gently so they all stay together until you undo the clamps.
The Tools you will need
Fig. 22 Maul
The Maul (a round wooden mallet, with a wooden handle).
The head of the maul is about eight inches long (200 m.m.) by about four inch diameter (100 m.m.). Make it out of the toughest wood you can find. It’s advisable to put steel bands around each end to prevent it from splitting. Drill a hole one inch diameter (25 m.m.) through it. Make sure that the hole is dead centre, because if it’s not it will wobble and make blisters on your hand. The handle, about two feet long (600 m.m.) must be made with strong, straight grained timber. The handle goes right through the

Page 34
maul and protrudes about one inch (25 m.m.) out the other side. Drive a small wedge into the protruding bit. This will hold the handle firmly in place.
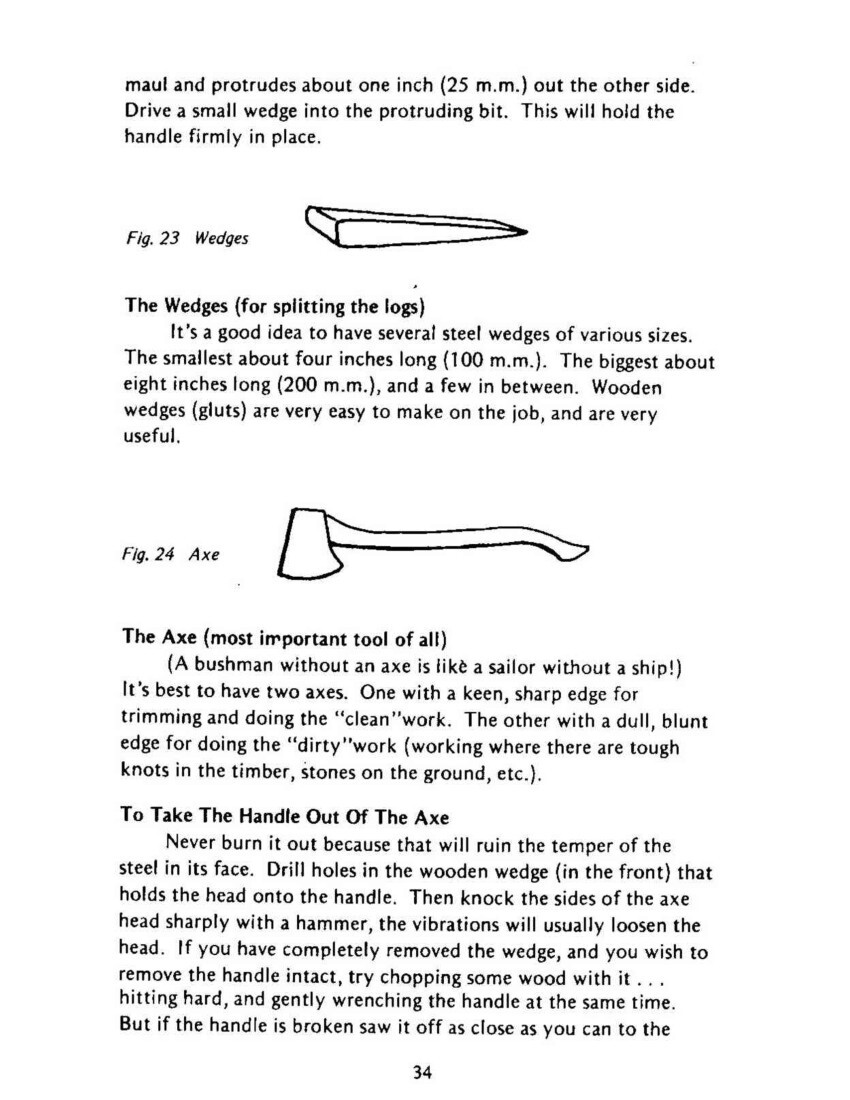
Fig. 23 Wedges
The Wedges (for splitting the logs)
It’s a good idea to have several steel wedges of various sizes. The smallest about four inches long (100 m.m.) The biggest about eight inches long (200 m.m.), and a few in between. Wooden wedges (gluts) are very easy to make on the job, and are very useful.
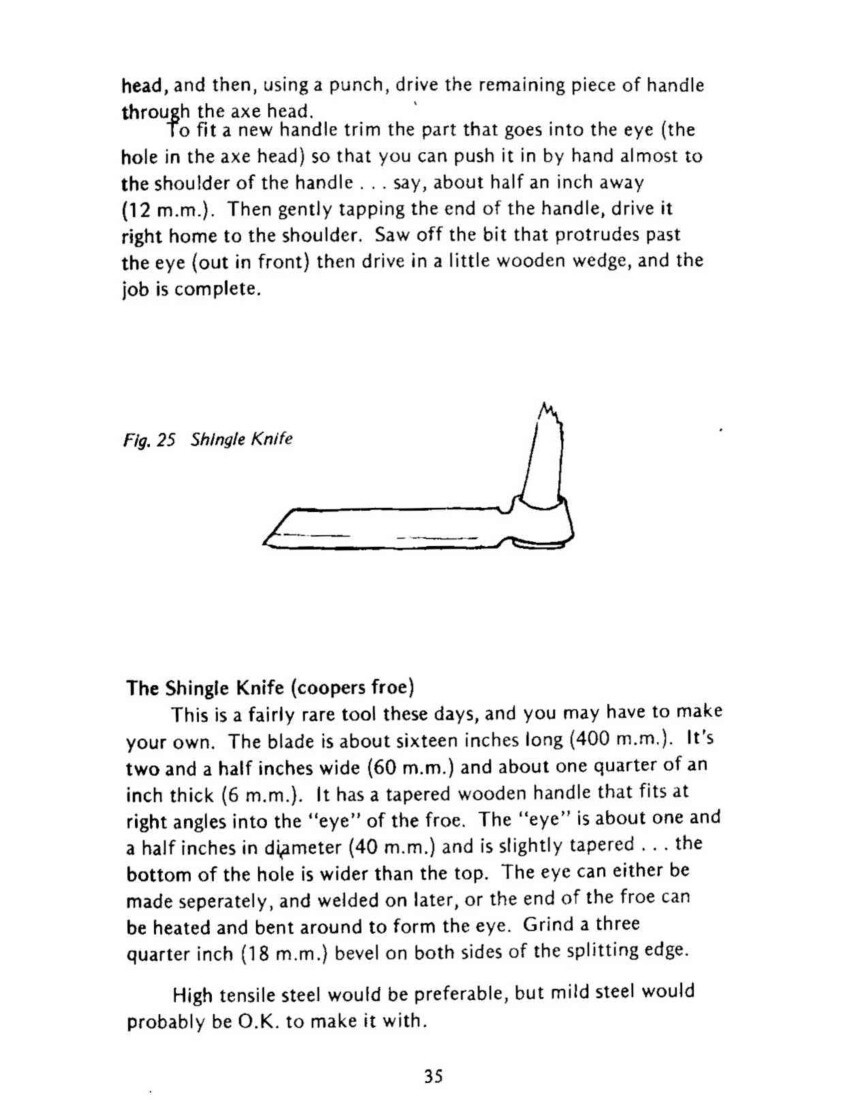
Fig. 24 Axe
The Axe (most important tool of all)
(A bushman without an axe is like a sailor without a ship!). It’s best to have two axes. One with a keen, sharp edge for trimming and doing the “clean” work. The other with a dull blunt edge for doing the “dirty” work (working where there are tough knots in the timber, stones on the ground, etc).
To Take The Handle Out Of The Axe
Never burn it out because that will ruin the temper of the steel in its face. Drill holes in the wooden wedge (in the front) that holds the head onto the handle. Then knock the sides of the axe head sharply with a hammer, the vibrations will usually loosen the head. If you have completely removed the wedge, and you wish to remove the handle intact, try chopping some wood with it . . . hitting hard, and gently wrenching the handle at the same time. But if the handle is broken saw it off as close as you can to the

Page 35
head, and then, using a punch, drive the remaining piece of handle through the axe head.
To fit a new handle trim the part that goes into the eye (the hole in the axe head) so that you can push it in by hand almost to the shoulder of the handle . . . say, about half an inch away. (12 m.m.). Then gently tapping the end of the handle, drive it right home to the shoulder. Saw off the bit that protrudes past the eye (out in front) then drive in a little wooden wedge, and the job is complete.
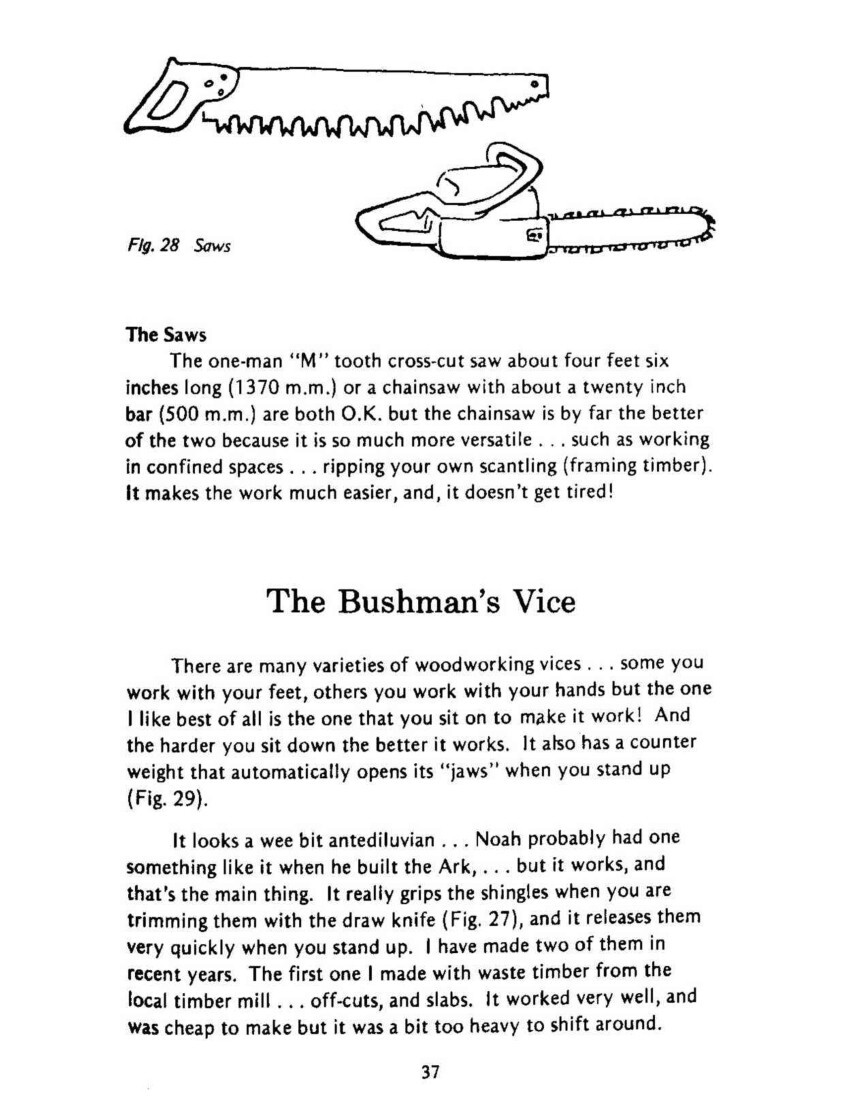
Fig. 25 Shingle Knife
The Shingle Knife (coopers froe)
This is a fairly rare tool these days, and you may have to make your own. The blade is about sixteen inches long (400 m.m.). It’s two and a half inches wide (60 m.m.) and about one quarter of an inch thick (6 m.m.). It has a tapered wooden handle that fits at right angles into the “eye” of the froe. The “eye” is about one and a half inches in diameter (40 m.m.) and is slightly tapered . . . the bottom of the hole is wider than the top. The eye can either be made separately, and welded on later, or the end of the froe can be heated and bent around to form the eye. Grind a three quarter inch (18 m.m.) bevel on both sides of the splitting edge.
High tensile steel would be preferable, but mild steel would probably be O.K. to make it with.

Page 36
Fig 26 Shingle Axe
The Shingle Axe
This is another very rare tool these days. It is a combination of both axe, and claw hammer. One side of its face is absolutely flat from the top of its hammer head right down to its cutting edge. The other side of the face is bevelled something like a carpenters chisel. The blade is specially shaped for trimming shingles. Always work with the flat side against the wood (the bevel is to throw the chips). You could probably improvise with a disc grinder and an ordinary tomahawk (hatchet). Grind one side absolutely flat, and then grind the bevel onto the other side . . . I’ve never tried it myself, but it should work!
Fig 27 Draw Knife
The Draw Knife
This is still readily available. It is about sixteen inches (400 m.m.) long, has a cutting blade about ten inches long (250 m.m.) and has one flat side and one bevelled side (like the chisel). Work with the flat side against the timber. It has two wooden handles set at right angles to the cutting edge. Quite easy to make with a bit of spring steel.
The Steel Plate (for making wooden nails)
This is dealt with elsewhere in this booklet. Grind the top of it occasionally to keep a sharp edge on the hole.

Page 37
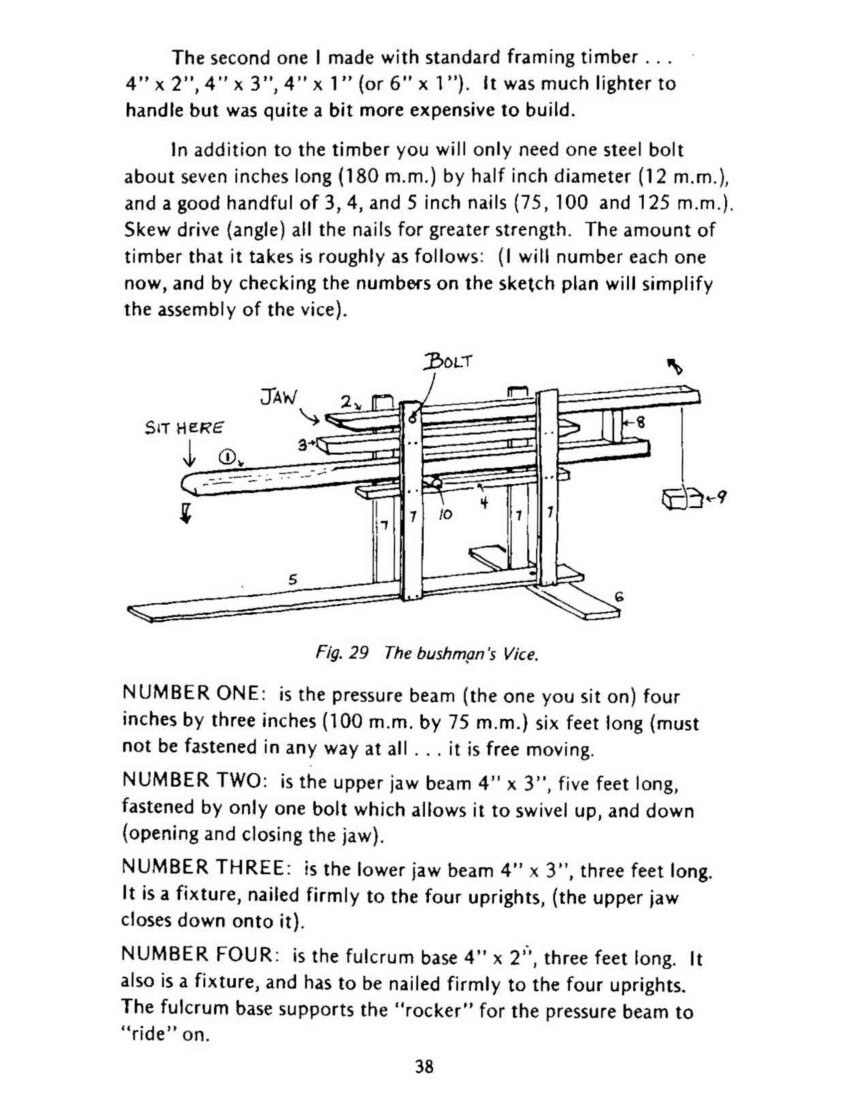
Fig. 28 Saws
The Saws
The one-man “M” tooth cross-cut saw about four feet six inches long (1370 m.m.) or a chainsaw with about a twenty inch bar (500 m.m.) are both O.K. but the chainsaw is by far the better of the two because it is so much more versatile . . . such as working in confined spaces . . . ripping your own scantling (framing timber). It makes the work much easier, and it doesn’t get tired!
The Bushman’s Vice
There are many varieties of woodworking vices…some you work with your feet, others you work with your hands but the one I like best of all is the one that you sit on to make it work! And the harder you sit down the better it works. It also has a counter weight that automatically opens its “jaws” when you stand up. (Fig. 29).
It looks a bit antediluvian . . . Noah probably had one something like it when he built the Ark . . . but it works, and that’s the main thing. It really grips the shingles when you are trimming them with the draw knife (Fig. 27), and it releases them very quickly when you stand up. I have made two of them in recent years. The first one I made with waste timber from the local timber mill . . . off-cuts and slabs. It worked very well, and was cheap to make but it was a bit too heavy to shift around.

Page 38
The second one I made with standard framing timber . . . 4” x 2”, 4” x 3”, 4” x 1” (or 6” x 1”). It was much lighter to handle but was quite a bit more expensive to build.
In addition to the timber you will only need one steel bolt about seven inches long (180 m.m.) by half inch diameter (12 m.m.), and a good handful of 3, 4, and 5 inch nails. (75, 100 and 125 m.m.). Skew drive (angle) all the nails for greater strength. The amount of timber that it takes is roughly as follows: (I will number each one now, and by checking the numbers on the sketch plan will simplify the assembly of the vice).
Fig. 29 The bushman’s Vice.
NUMBER ONE: is the pressure beam (the one you sit on) four inches by three inches (100 m.m. by 75 m.m.) six feet long (must not be fastened in any way at all . . . it is free moving.
NUMBER TWO: is the upper jaw beam 4” x 3”, five feet long, fastened by only one bolt which allows it to swivel up, and down (opening and closing the jaw).
NUMBER THREE: is the lower jaw beam 4” x 3”, three feet long. It is a fixture, nailed firmly to the four uprights, (the upper jaw closes down onto it).
NUMBER FOUR: is the fulcrum base 4” x 2”, three feet long. It is also a fixture, and has to be nailed firmly to the four uprights. The fulcrum base supports the “rocker” for the pressure beam to “ride on”.

Page 39
NUMBER FIVE: is the base plate 4” x 2”, six feet long. It is the “foot” of the vice, and is nailed firmly to the bottom ends of the four uprights.
It extends to about four feet out the back (the “sitting” end). The front end will have the stabilizing wing attached at right angles across it to prevent the vice from falling sideways.
NUMBER SIX: is the stabilizing wing, 6” x 1” about four feet long and directly under the front upright.
NUMBER SEVEN: are the four uprights. They can be either 6” x 1” or they can be 4” x 2” (if 4” x 2” is used the seven inch bolt will have to be correspondingly longer) and three feet six inches long. These uprights are to be nailed firmly onto the base plate, the fulcrum base, and the lower jaw beam (they are the “fixed” ones). The bolt goes through the top end of the uprights and the upper jaw beam (allowing it to swivel up and down). Put the bolt through about six or eight inches from the jaw. You will need to experiment a little to get the opening, closing and pressure the way you want it.
Hang a counter weight on the far end of the upper jaw beam (a brick on a string (9) or a few stones in a bag).
You will need a short “thrust stud” (8) fixed vertically at the far end of the pressure beam. A piece of 4” x 2” about eight inches long would be O.K. but you will need to experiment a wee bit because other measurements can have an effect on the workings.
The length of the thrust stud (8) is vital because it is the thing that governs the amount of “bite” that the jaws have. When you sit on the pressure beam (1) it forces the thrust stud upwards which in turn forces the jaws to close with a fair amount of pressure . . . keep your fingers clear!
You will also need to experiment with the size and shape of the “rocker” (10) on the fulcrum beam. Its location plays a big part in the leverage of the pressure beam (1).


Original digital file
CollinsGW1994-16_Pioneer.pdf
Non-commercial use

This work is licensed under a Attribution-NonCommercial 3.0 New Zealand (CC BY-NC 3.0 NZ).
Commercial Use
Please contact us for information about using this material commercially.Can you help?
The Hawke's Bay Knowledge Bank relies on donations to make this material available. Please consider making a donation towards preserving our local history.
Visit our donations page for more information.
Subjects
Format of the original
Book paperbackDate published
1982People
- Olaf
- Canon Butterfield
- Alexander and Mrs Mills
- Jimmy Ranapia
Accession number
638670Supporters and sponsors
We sincerely thank the following businesses and organisations for their support.


Do you know something about this record?
Please note we cannot verify the accuracy of any information posted by the community.